Mesh configuration with Cisco WLC C9800 and APs to create a wireless bridge.
What is a wireless bridge? A wireless bridge is when you connect two or more local area networks (LANs) wirelessly without using Ethernet cable or fiber. Therefore, you can extend the network from Root AP (RAP) on one side via a wireless link to Mesh AP (MAP) on the other side. The bridge and mesh network support end-to-end security by employing Advanced Encryption Standard (AES) between the wireless nodes with Wireless Protected Access 2 and 3 (WPA2 & WPA3) clients.
With the C9130AXI/AXE APs either radio can be configured and used for local client access and then the other for a wireless backhaul. Usually the wireless backhaul is configured on 5GHz radio because its bandwidth is higher than the other 2.4GHz radio that is utilized for clients support. This is particularly suitable if the RAP aggregates multiple bridge/mesh APs and/or when it connects another LAN network segment (multiple switches with local APs etc.). However, it all depends on the constraints and requirements such as bandwidth, distance, coverage, and etc.
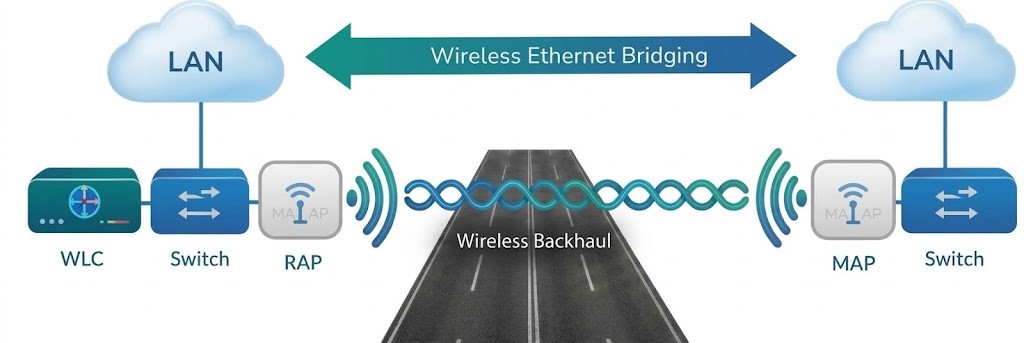
This following process will demonstrate how to create a wireless bridge via mesh configuration on Cisco C9800-L WLC. In this example we will use two Cisco Catalyst 9130AXI APs as a RAP and MAP.
To make it all work together both APs have to join the WLC and then they need to be converted to a Bridge mode.
For the APs to be able join the WLC they need to be MAC authenticated. The APs MAC address must be added to the WLC's database to verify that they have access to the controller and network.
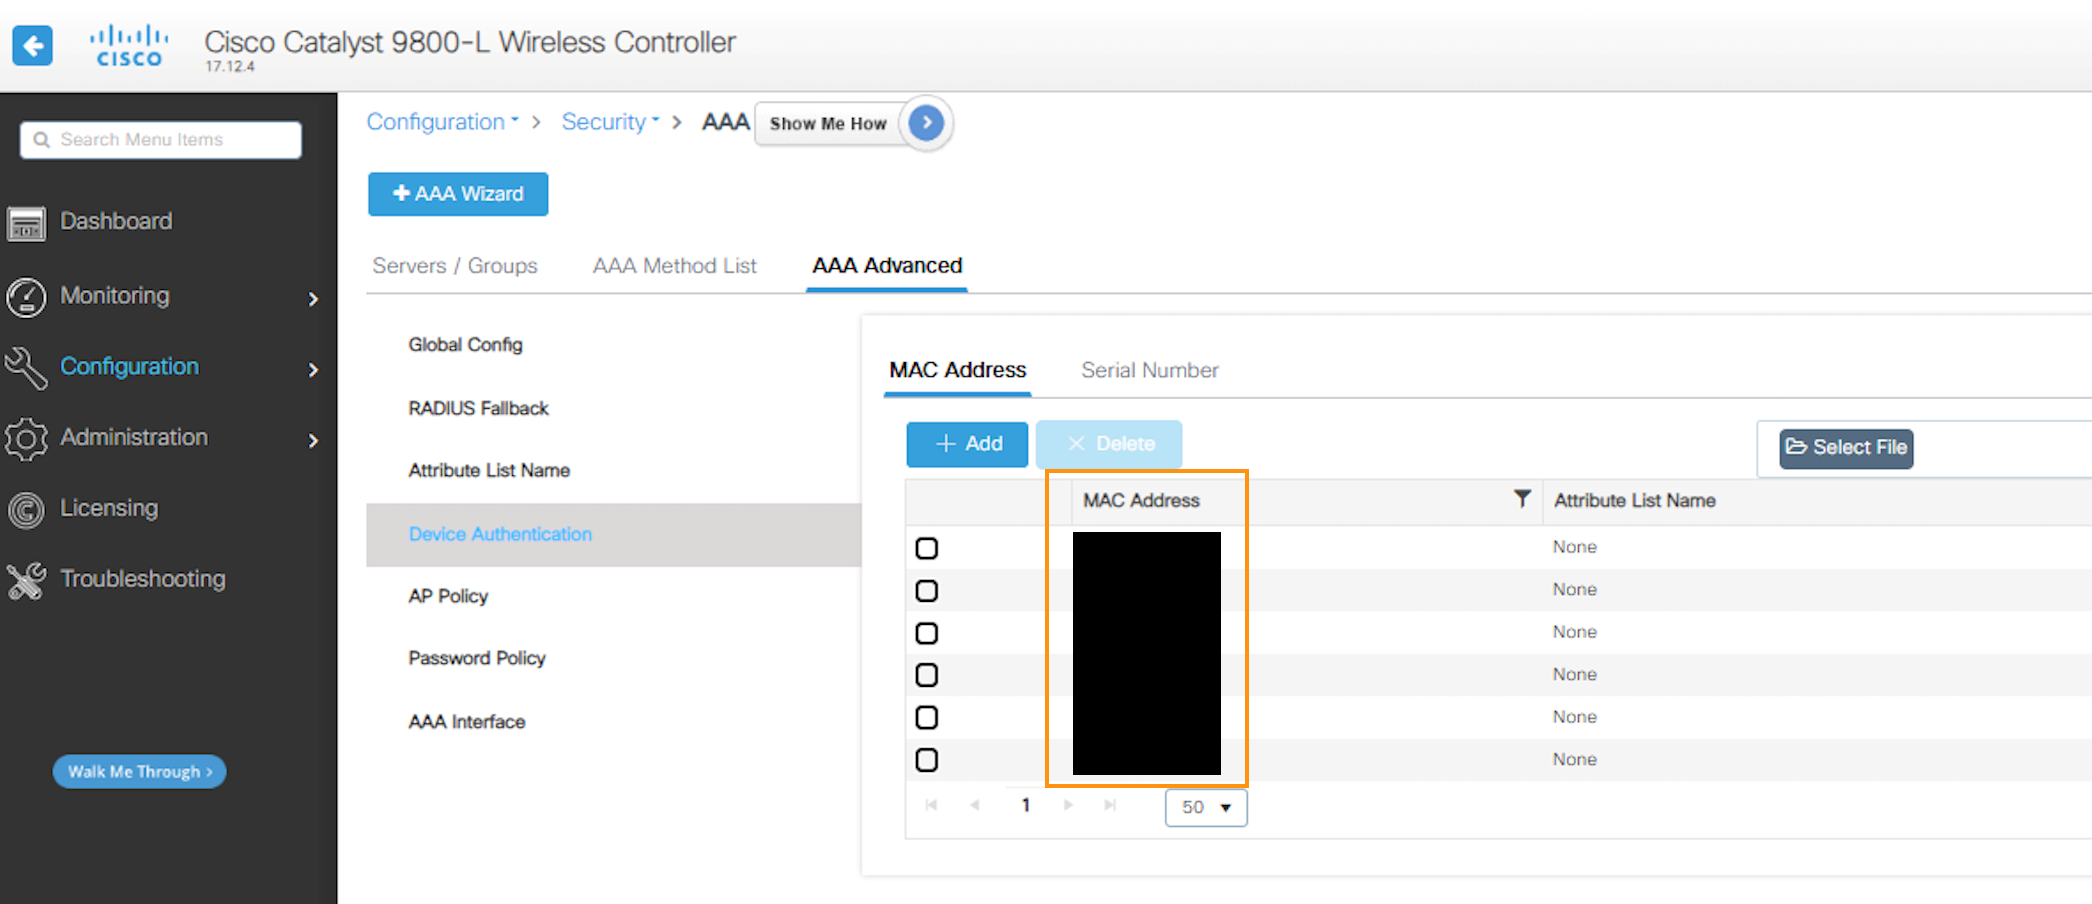 To do this, add both APs (RAP/MAP) base MAC address (only letters and numbers, no special characters) in the WLC GUI under the: Configuration>Security>AAA>AAA Advanced>Device Authentication>+Add
The next step is to create Authentication and Authorization method lists.
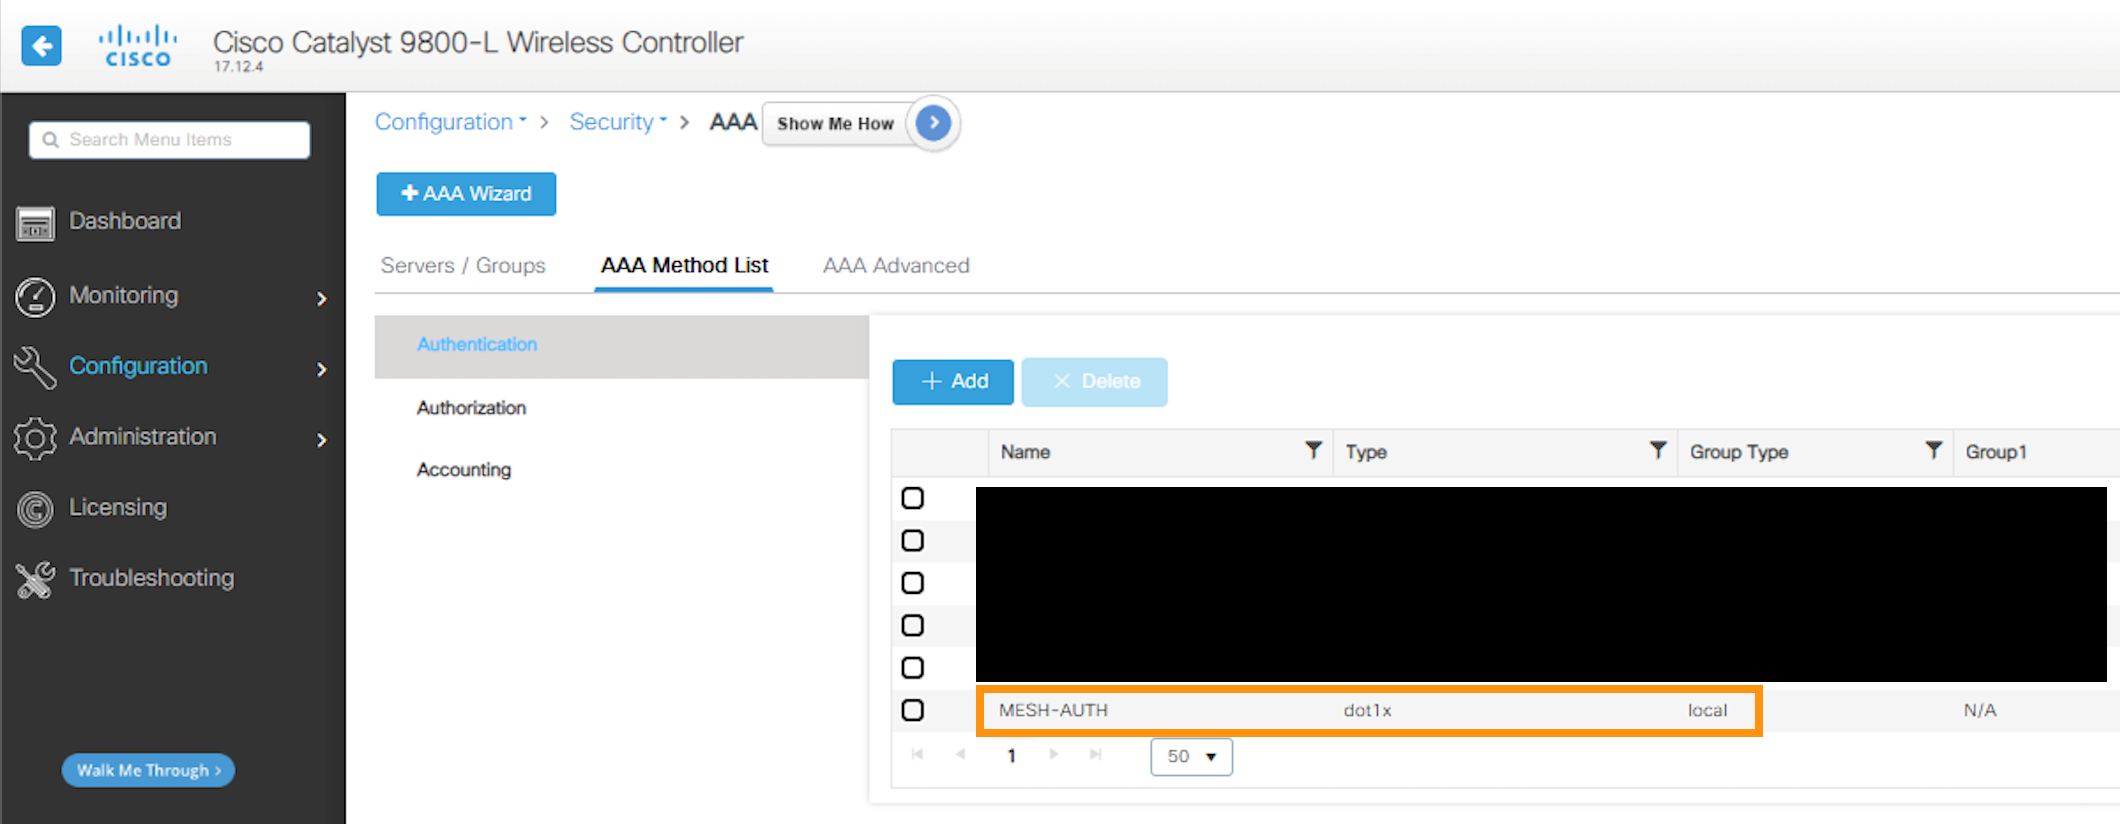 To create the authentication method list go under:
Configuration>Security>AAA>AAA Method List>Authentication>+Add
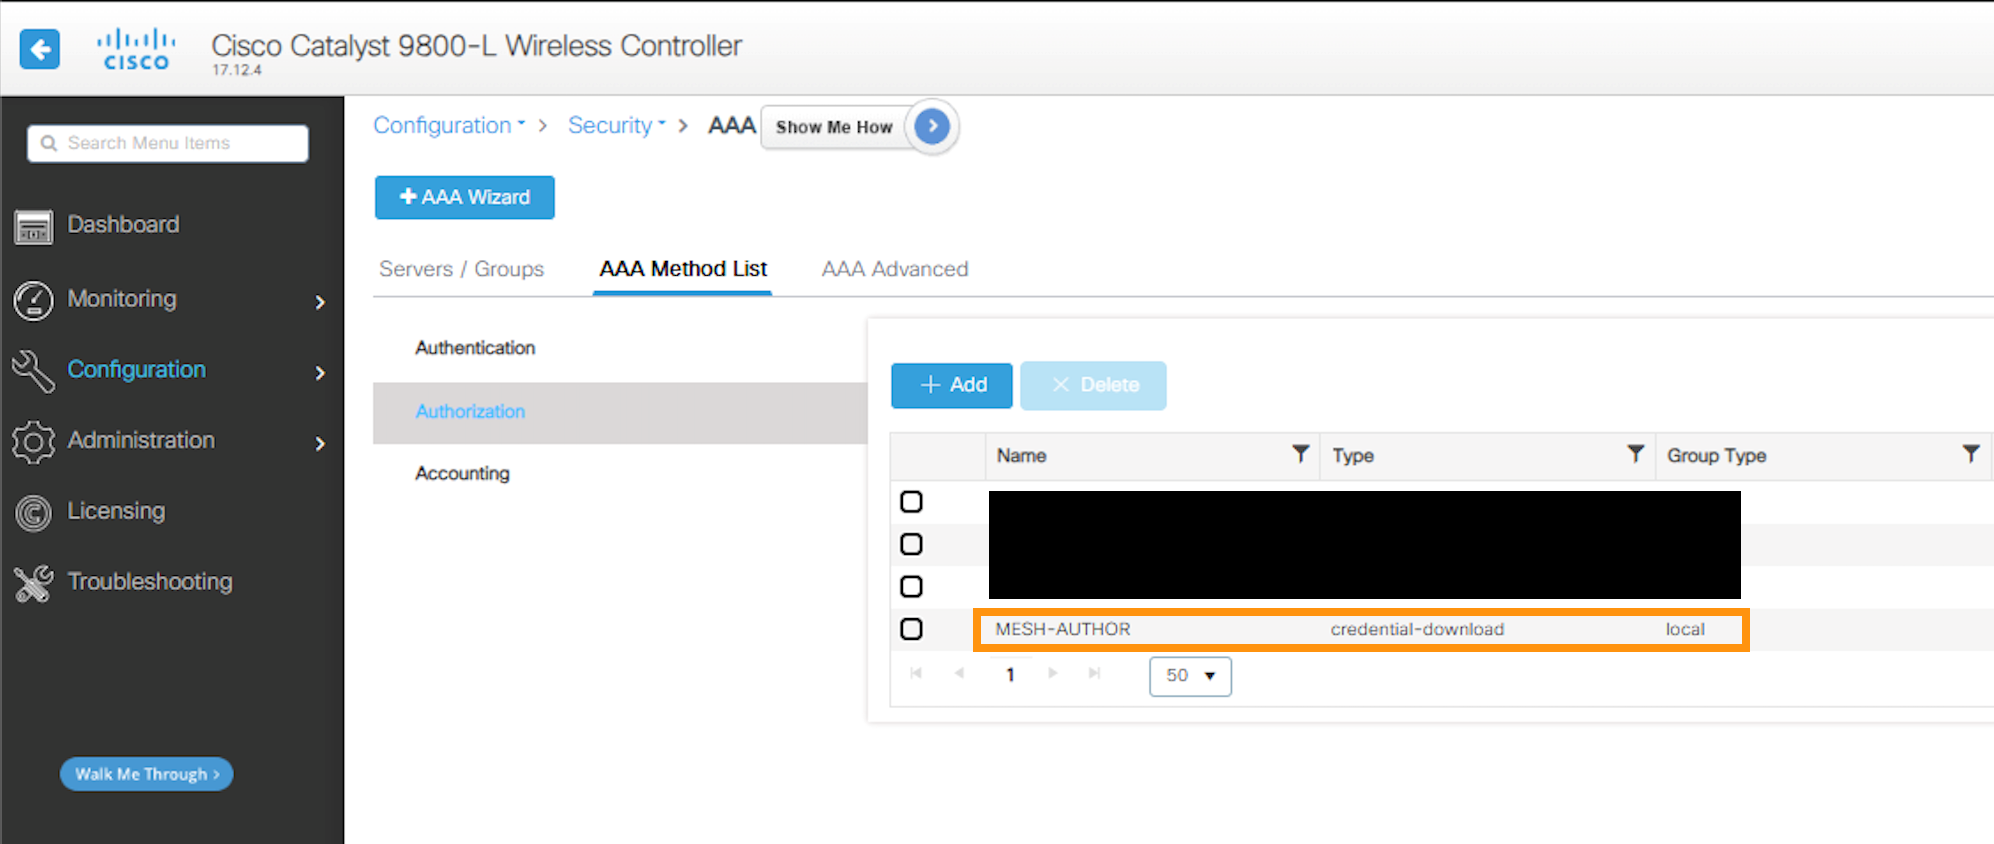 To create the authorization method list go under:
Configuration>Security>AAA>AAA Method List>Authorization>+Add
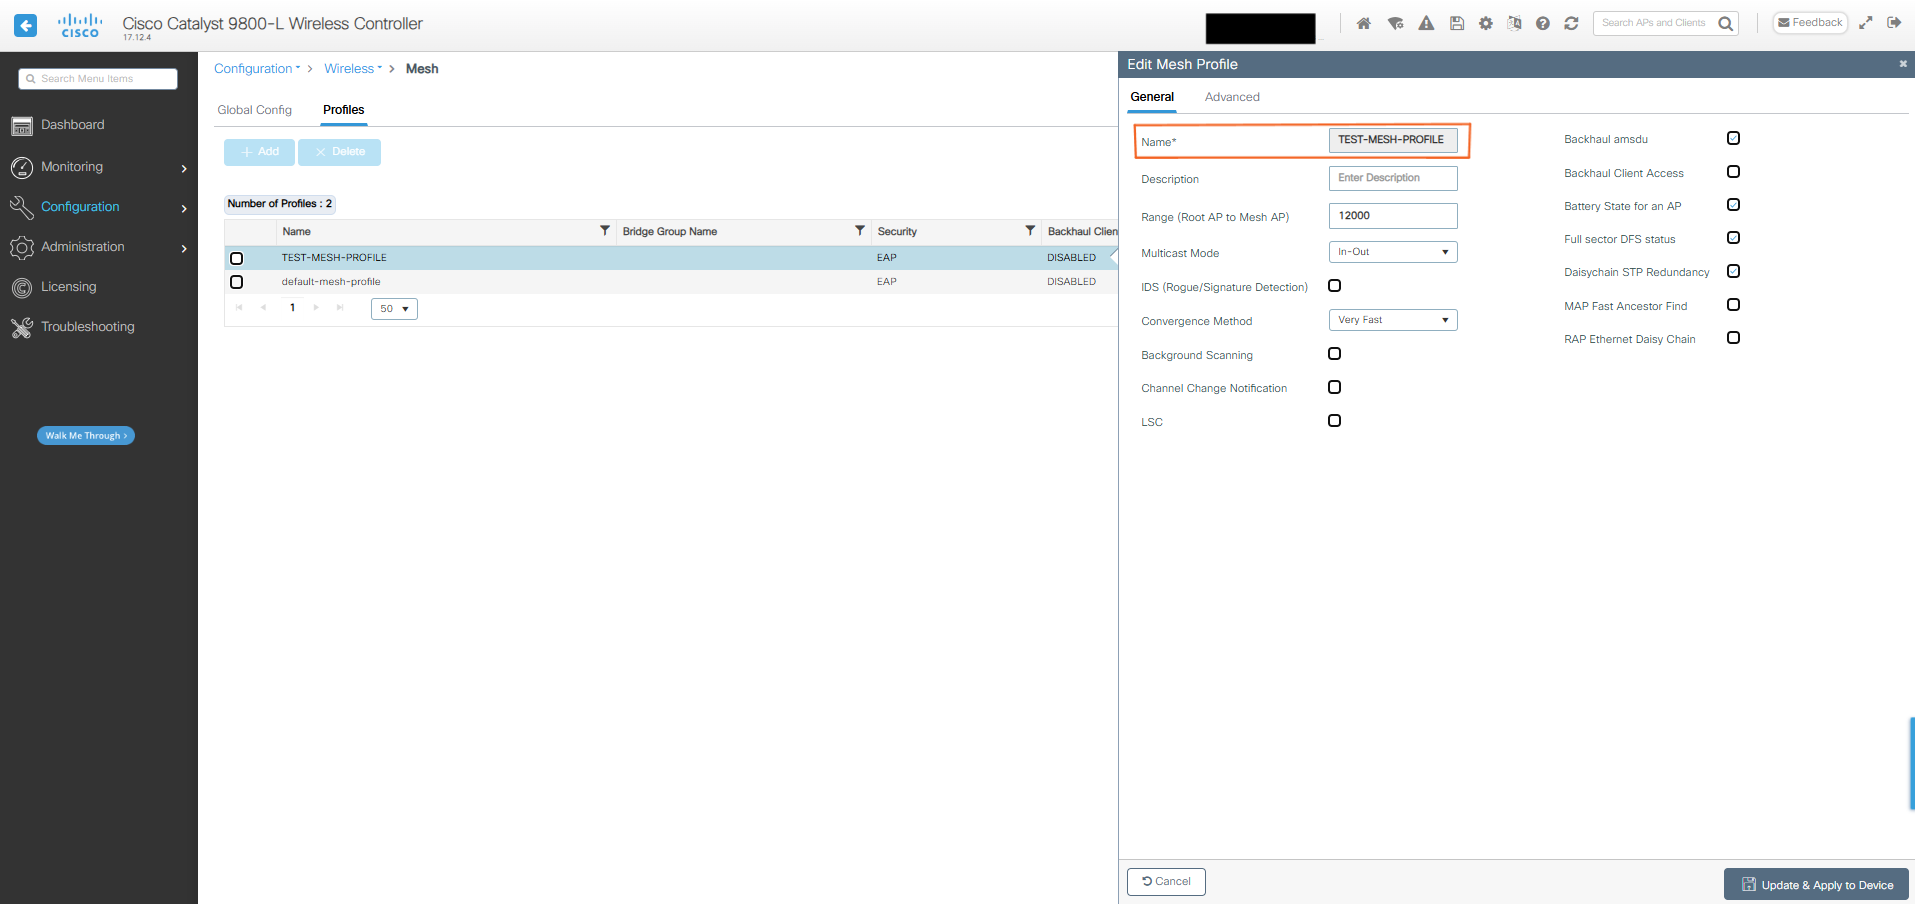 Then configure the global mesh parameters in WLC GUI under:
Configuration>Wireless>Mesh>Global>Profile>+Add
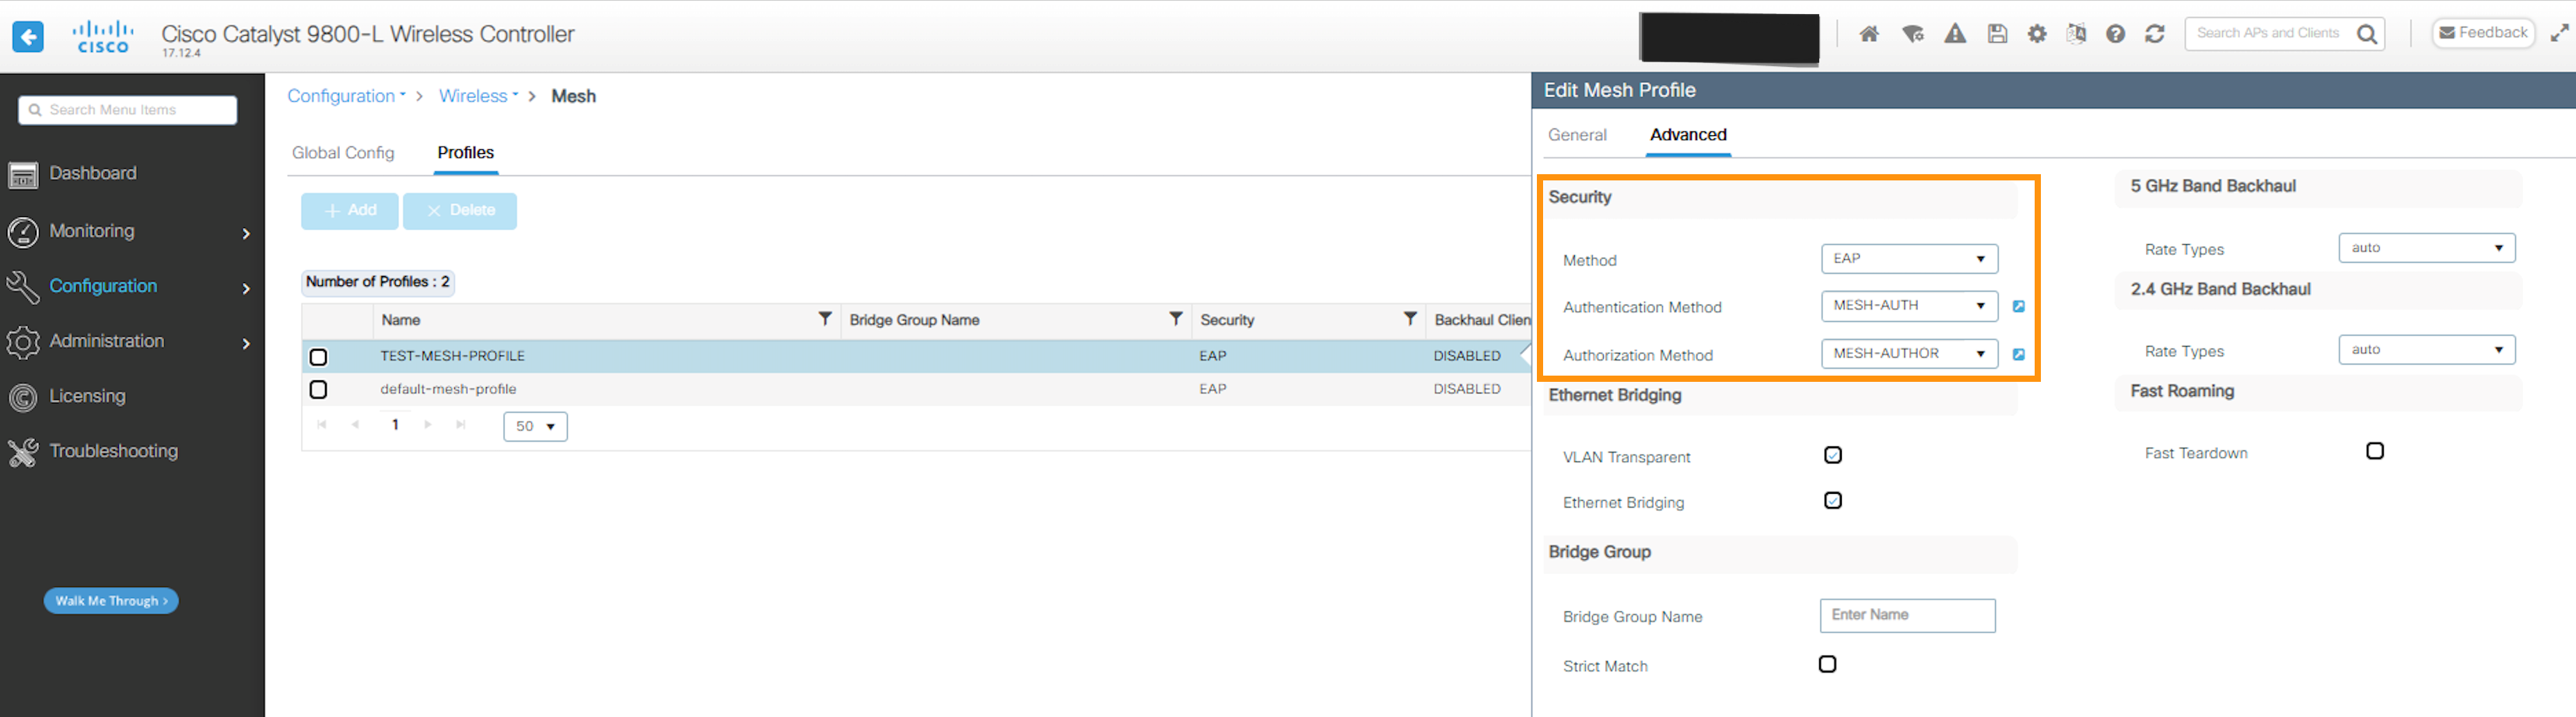 After that to map the Authentication and Authorization Profiles to the Mesh Profile under:
Configuration>Wireless>Mesh>Advanced
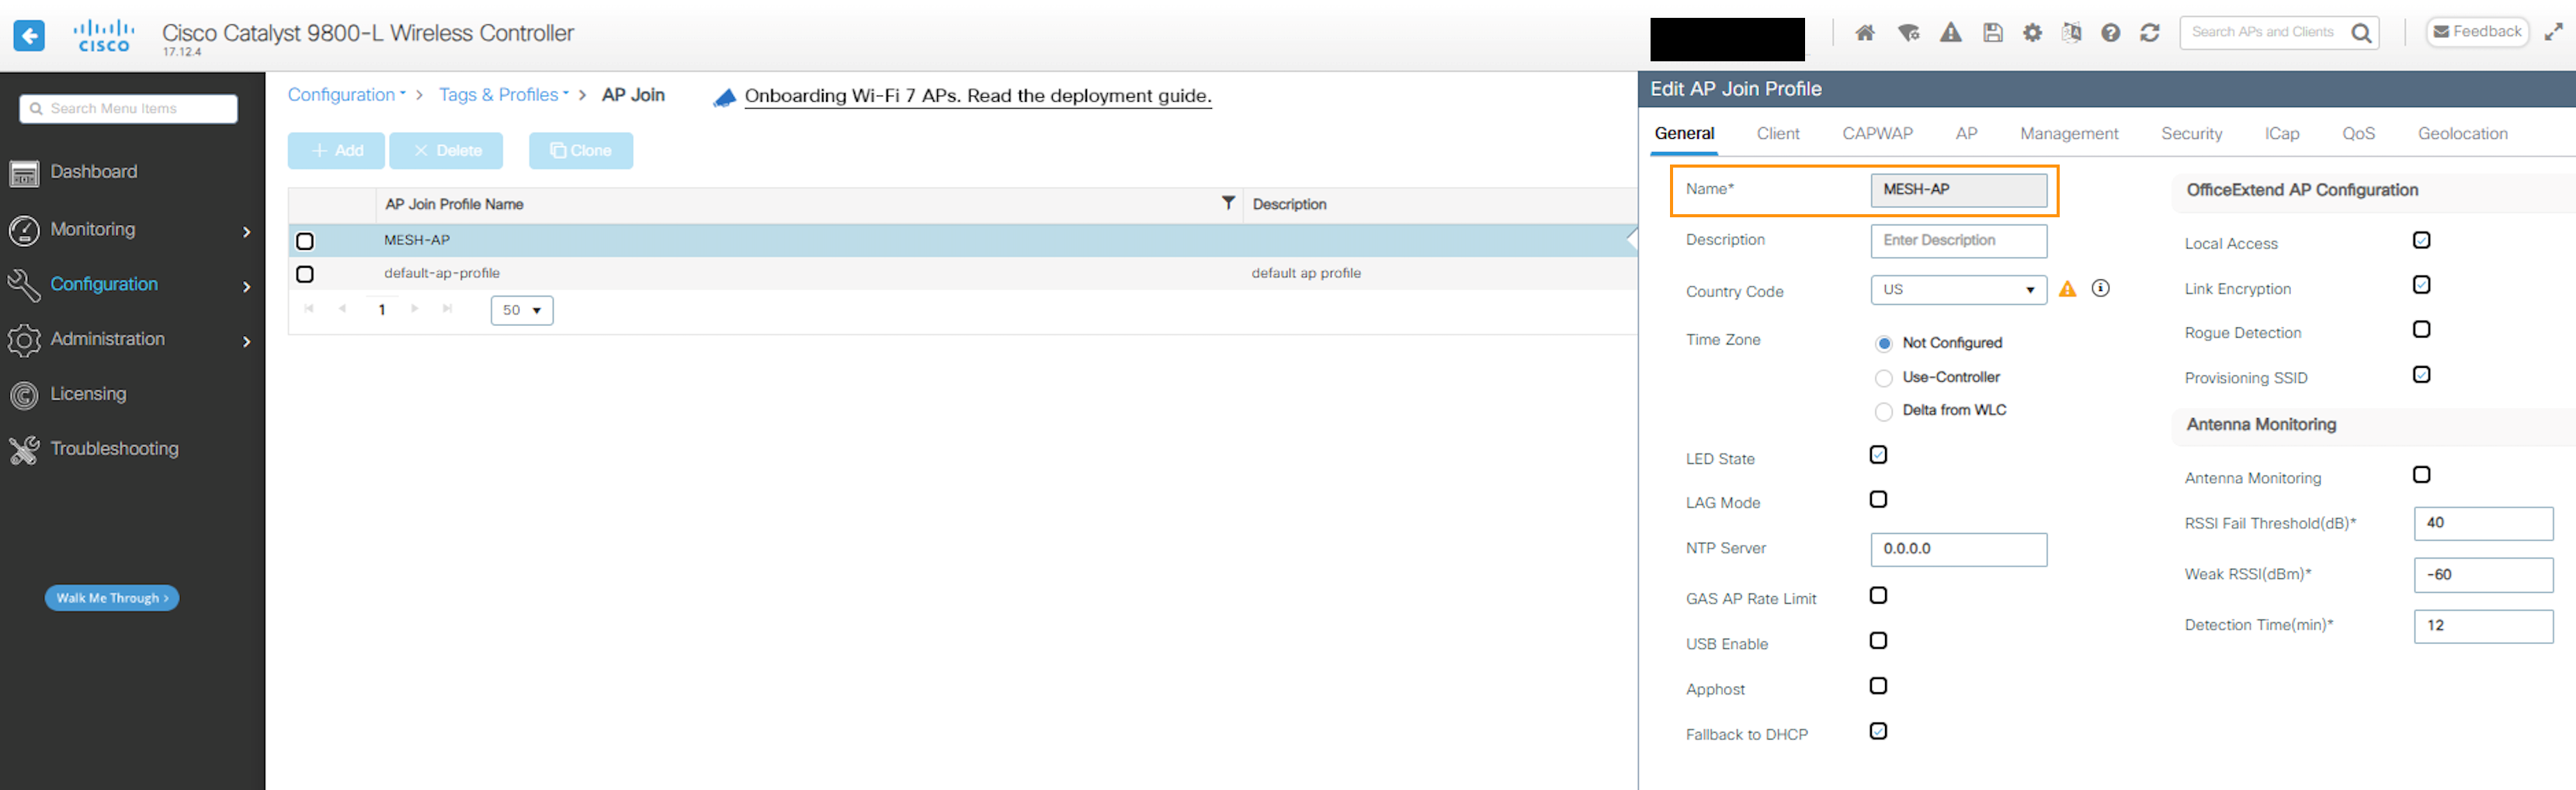 Then create a new AP join profile under:
Configuration>Tags & Profiles>AP Join>+Add
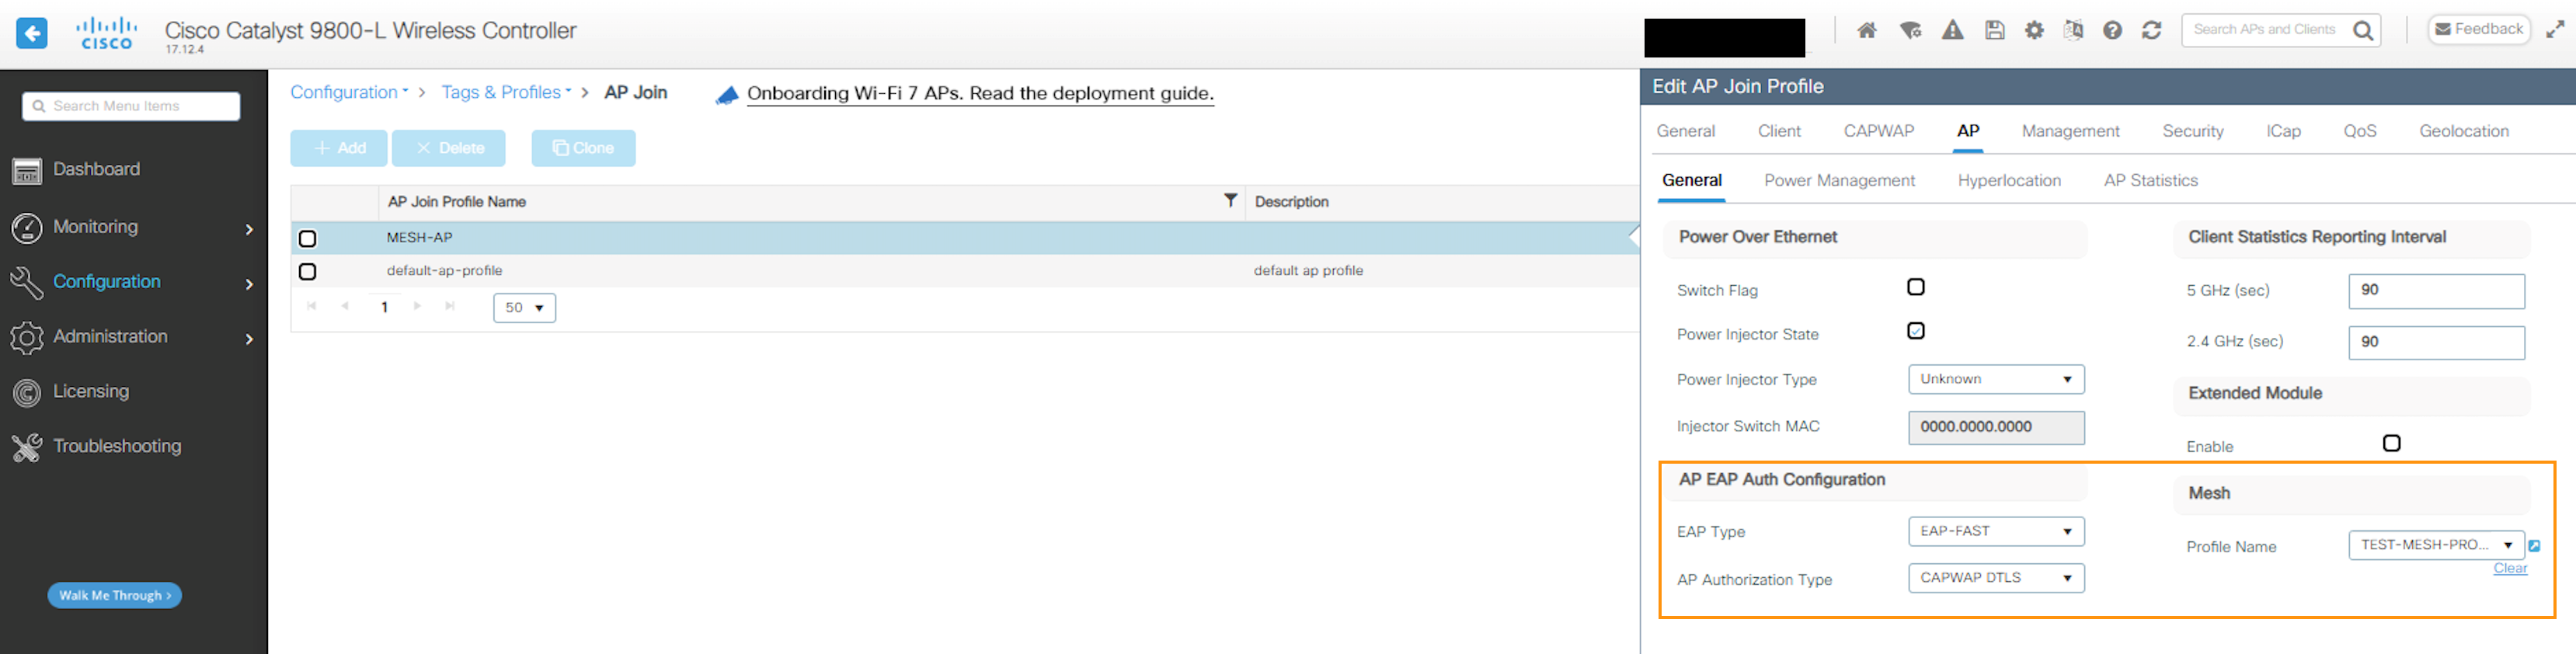 Now apply the Mesh Profile and configure the AP EAP Auth Configuration under:
Configure>Tags & Profiles>AP Join>Edit AP Join Profile>AP>General
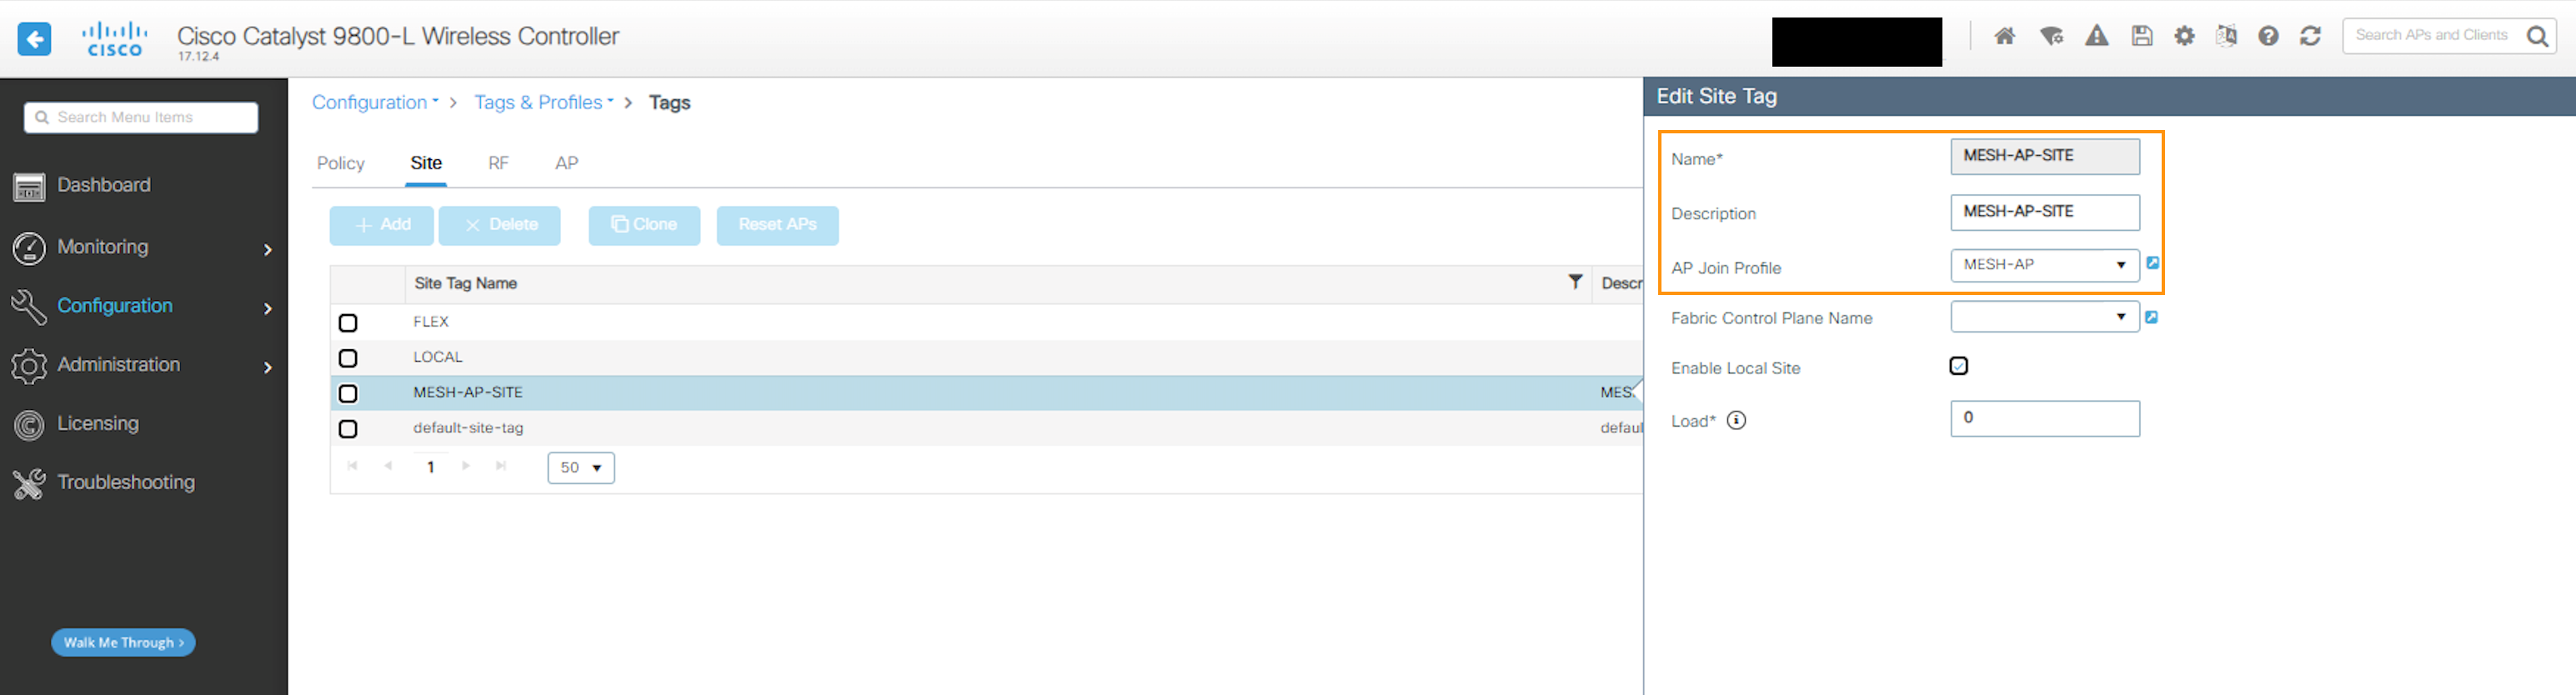 Now you have to create a mesh location Tag under:
Configure>Tags & Profiles>Tags>Site>+Add
and under this new site Tag add the Mesh AP Join Profile to it:
Configure>Tags & Profiles>Tags>Site>Edit Site Tag
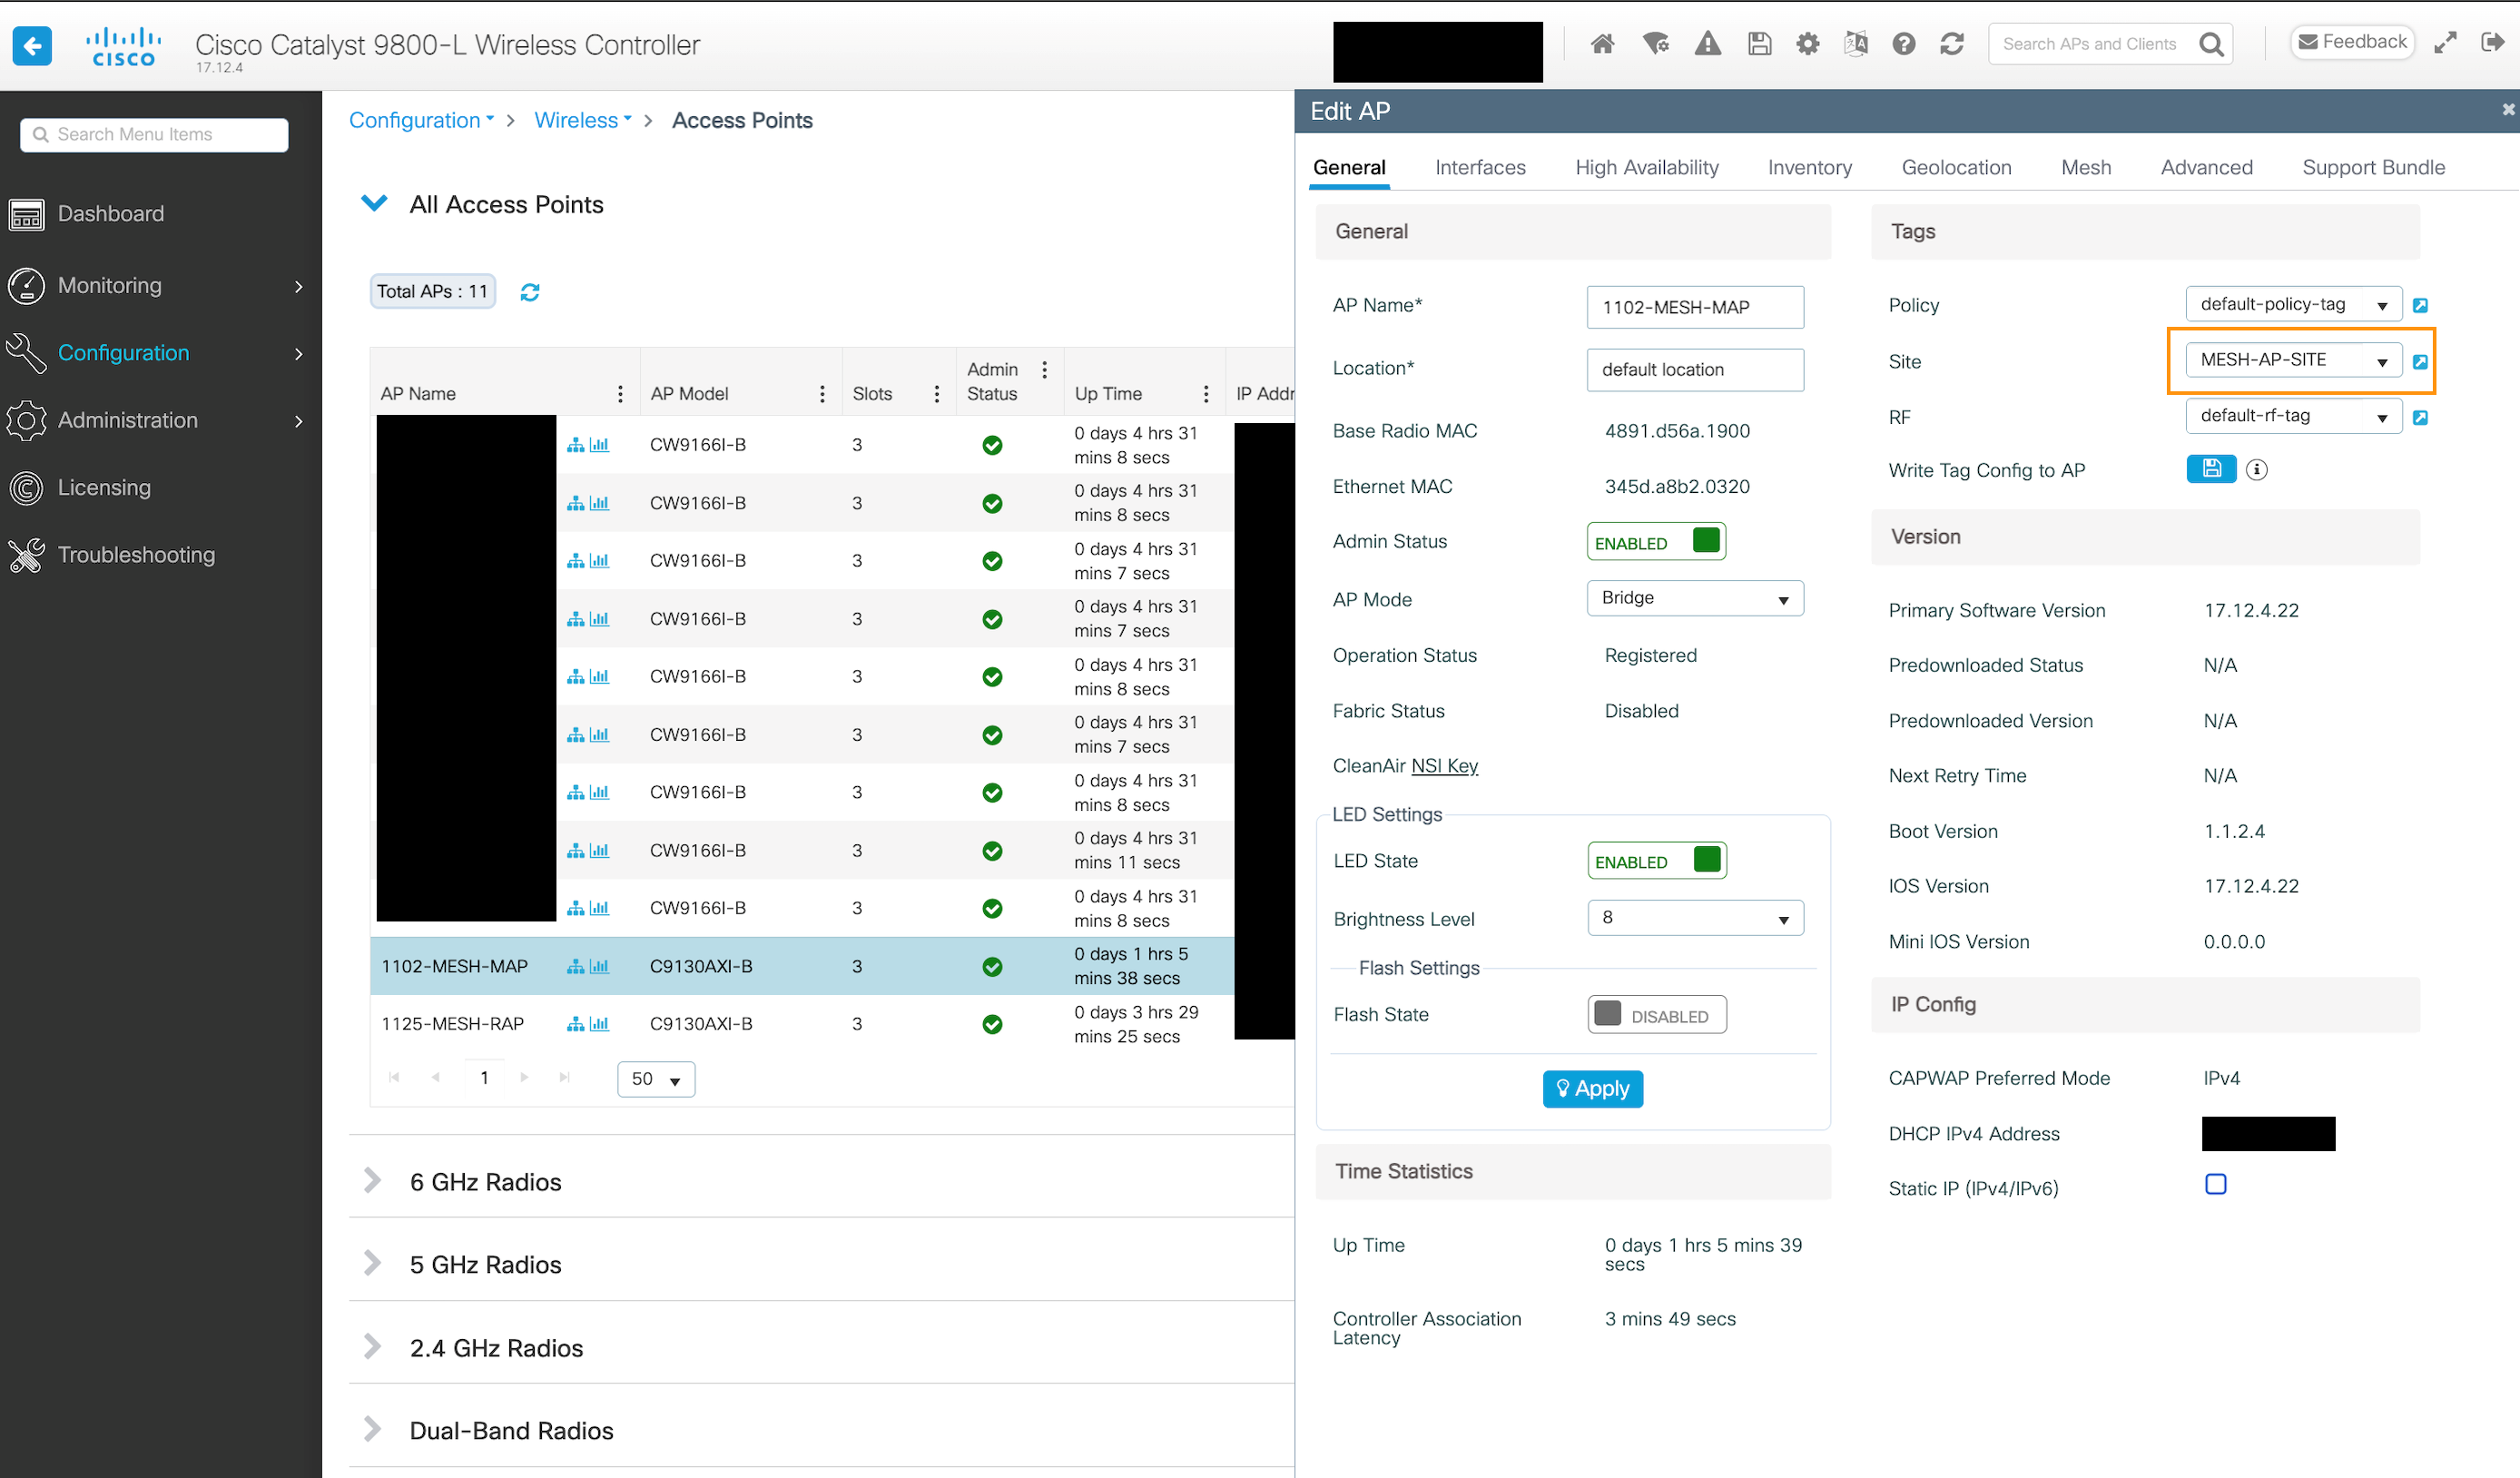 Assign this Site Tag to the AP under:
Configuration>Wireless>Access Points>Edit AP>General
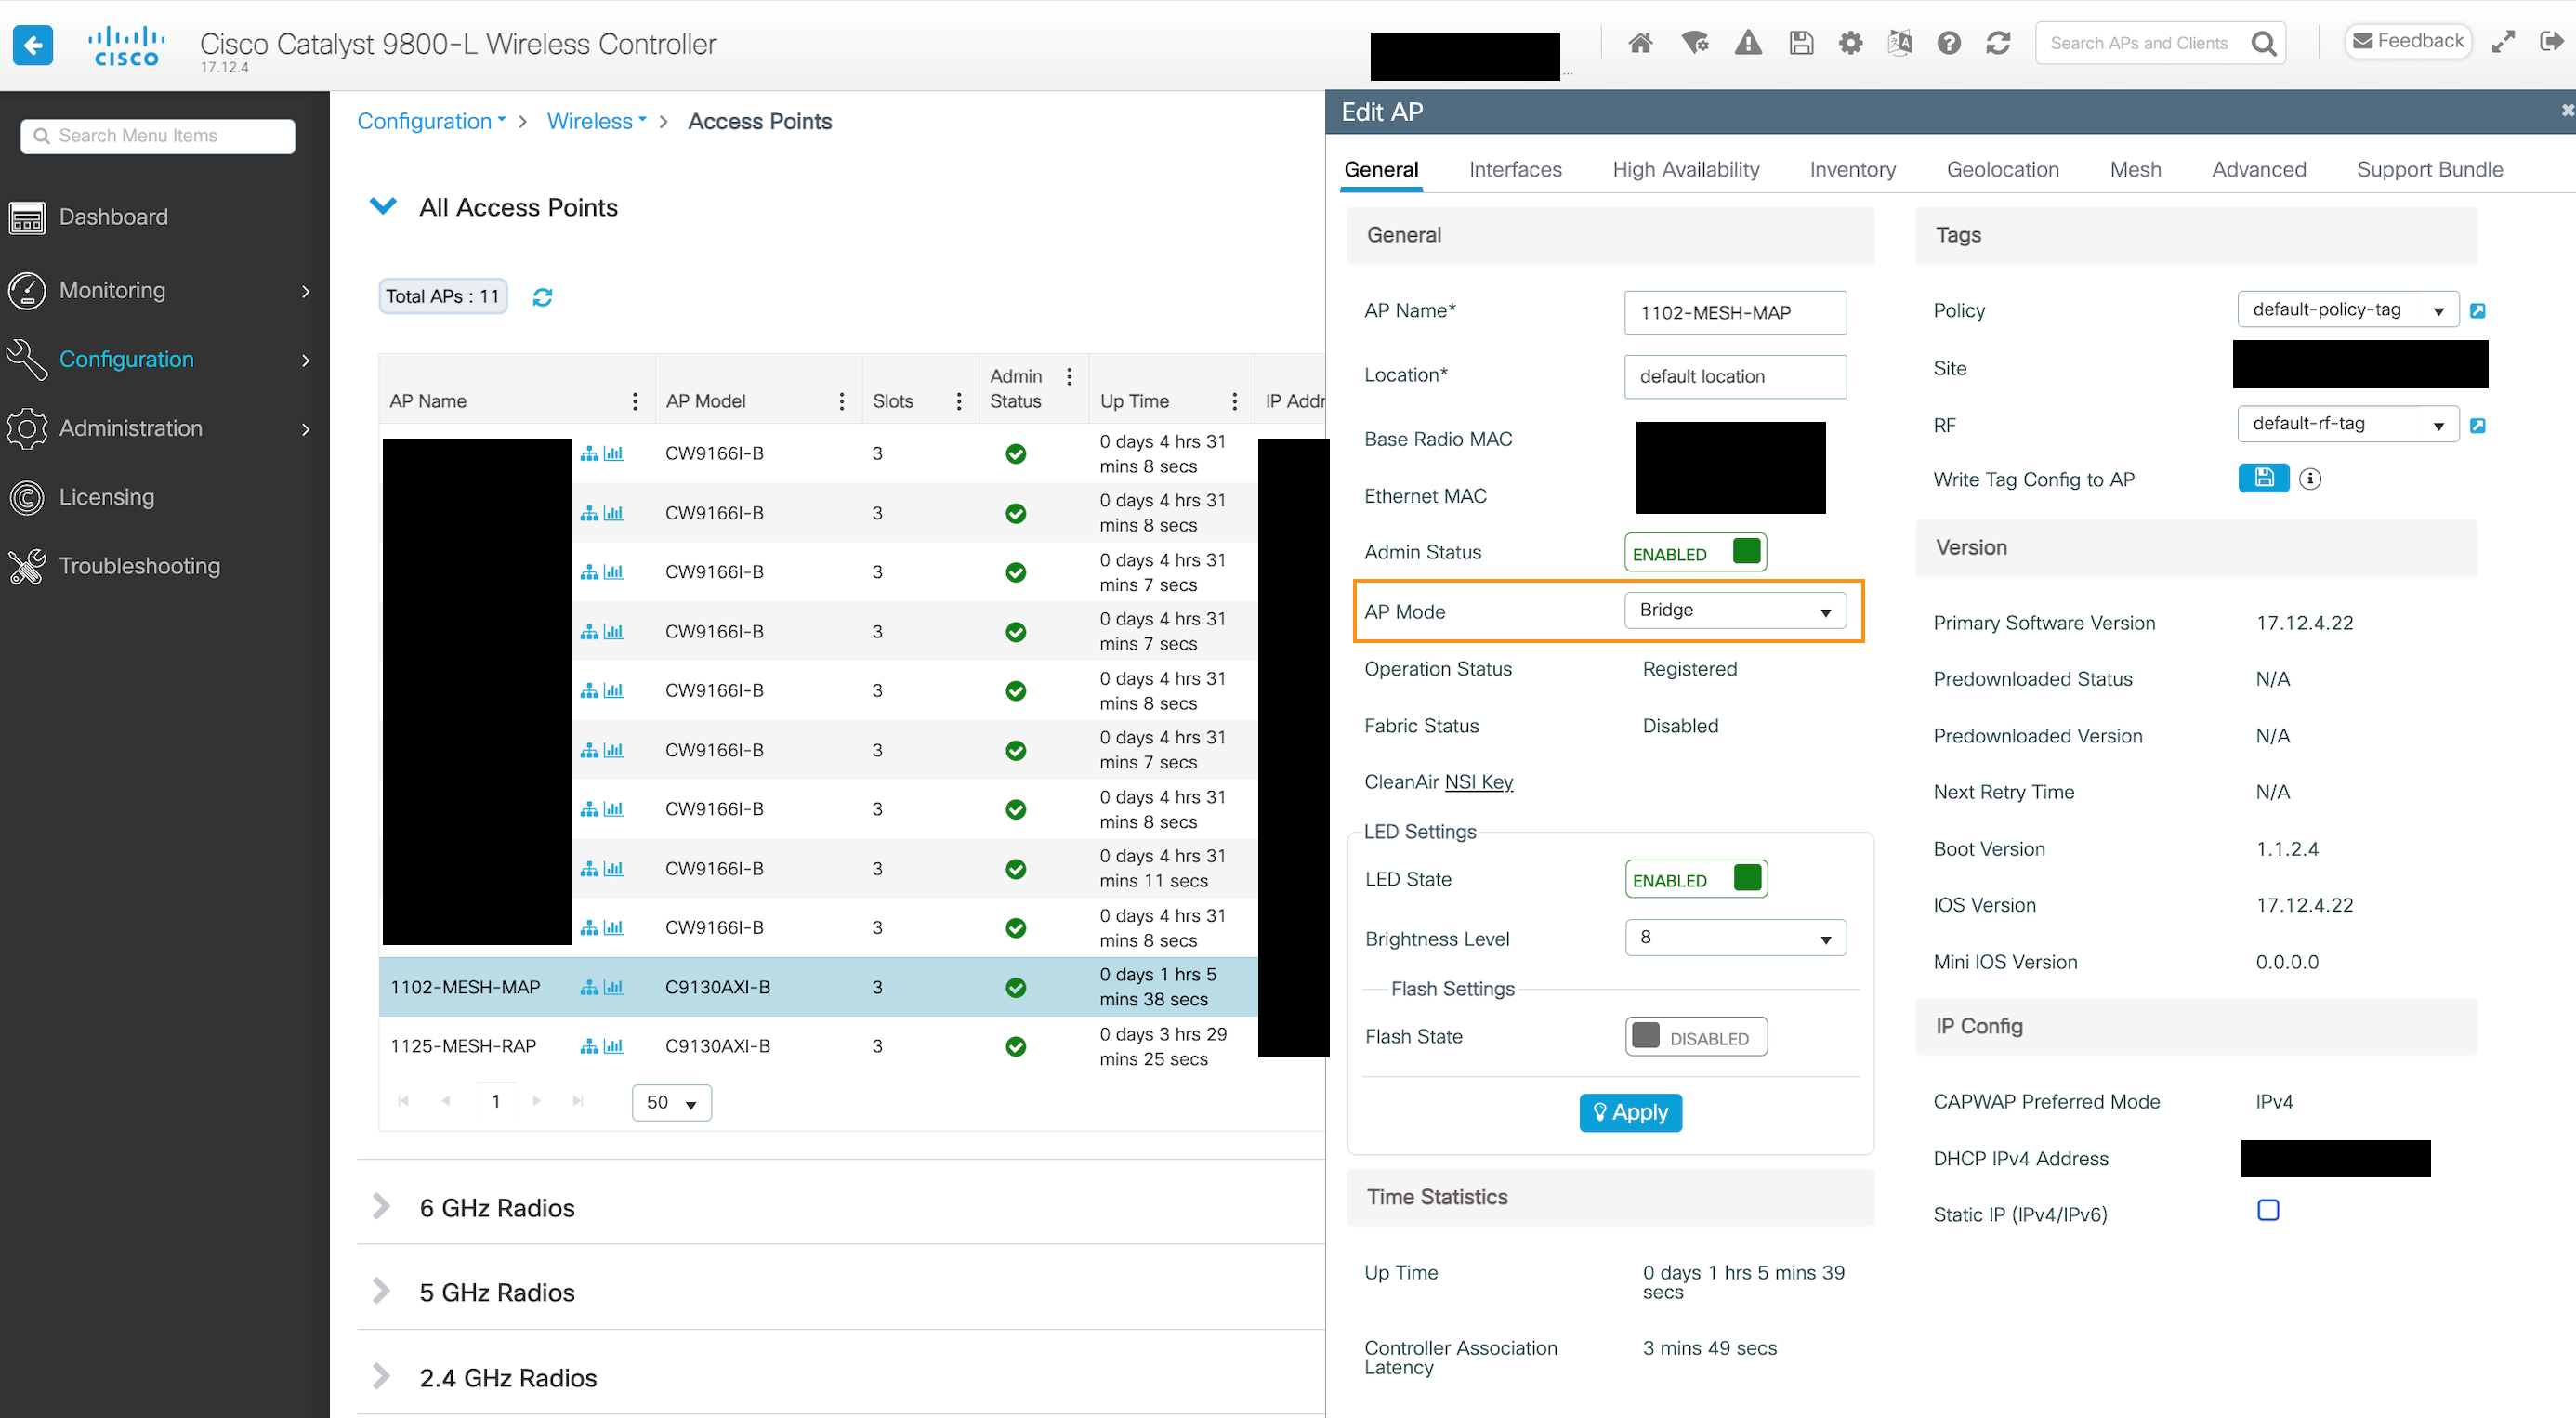 Make sure to convert the AP to the Bridge Mode first under:
Configuration>Wireless>Access Points>Edit AP>General
After the AP reboots it will join in the Bridge Mode.
In the next step assign the AP's Role to either RAP or MAP. The RAP is connected to the WLC via wired connection and the MAP is connected to the WLC via the RAP wireless connection.
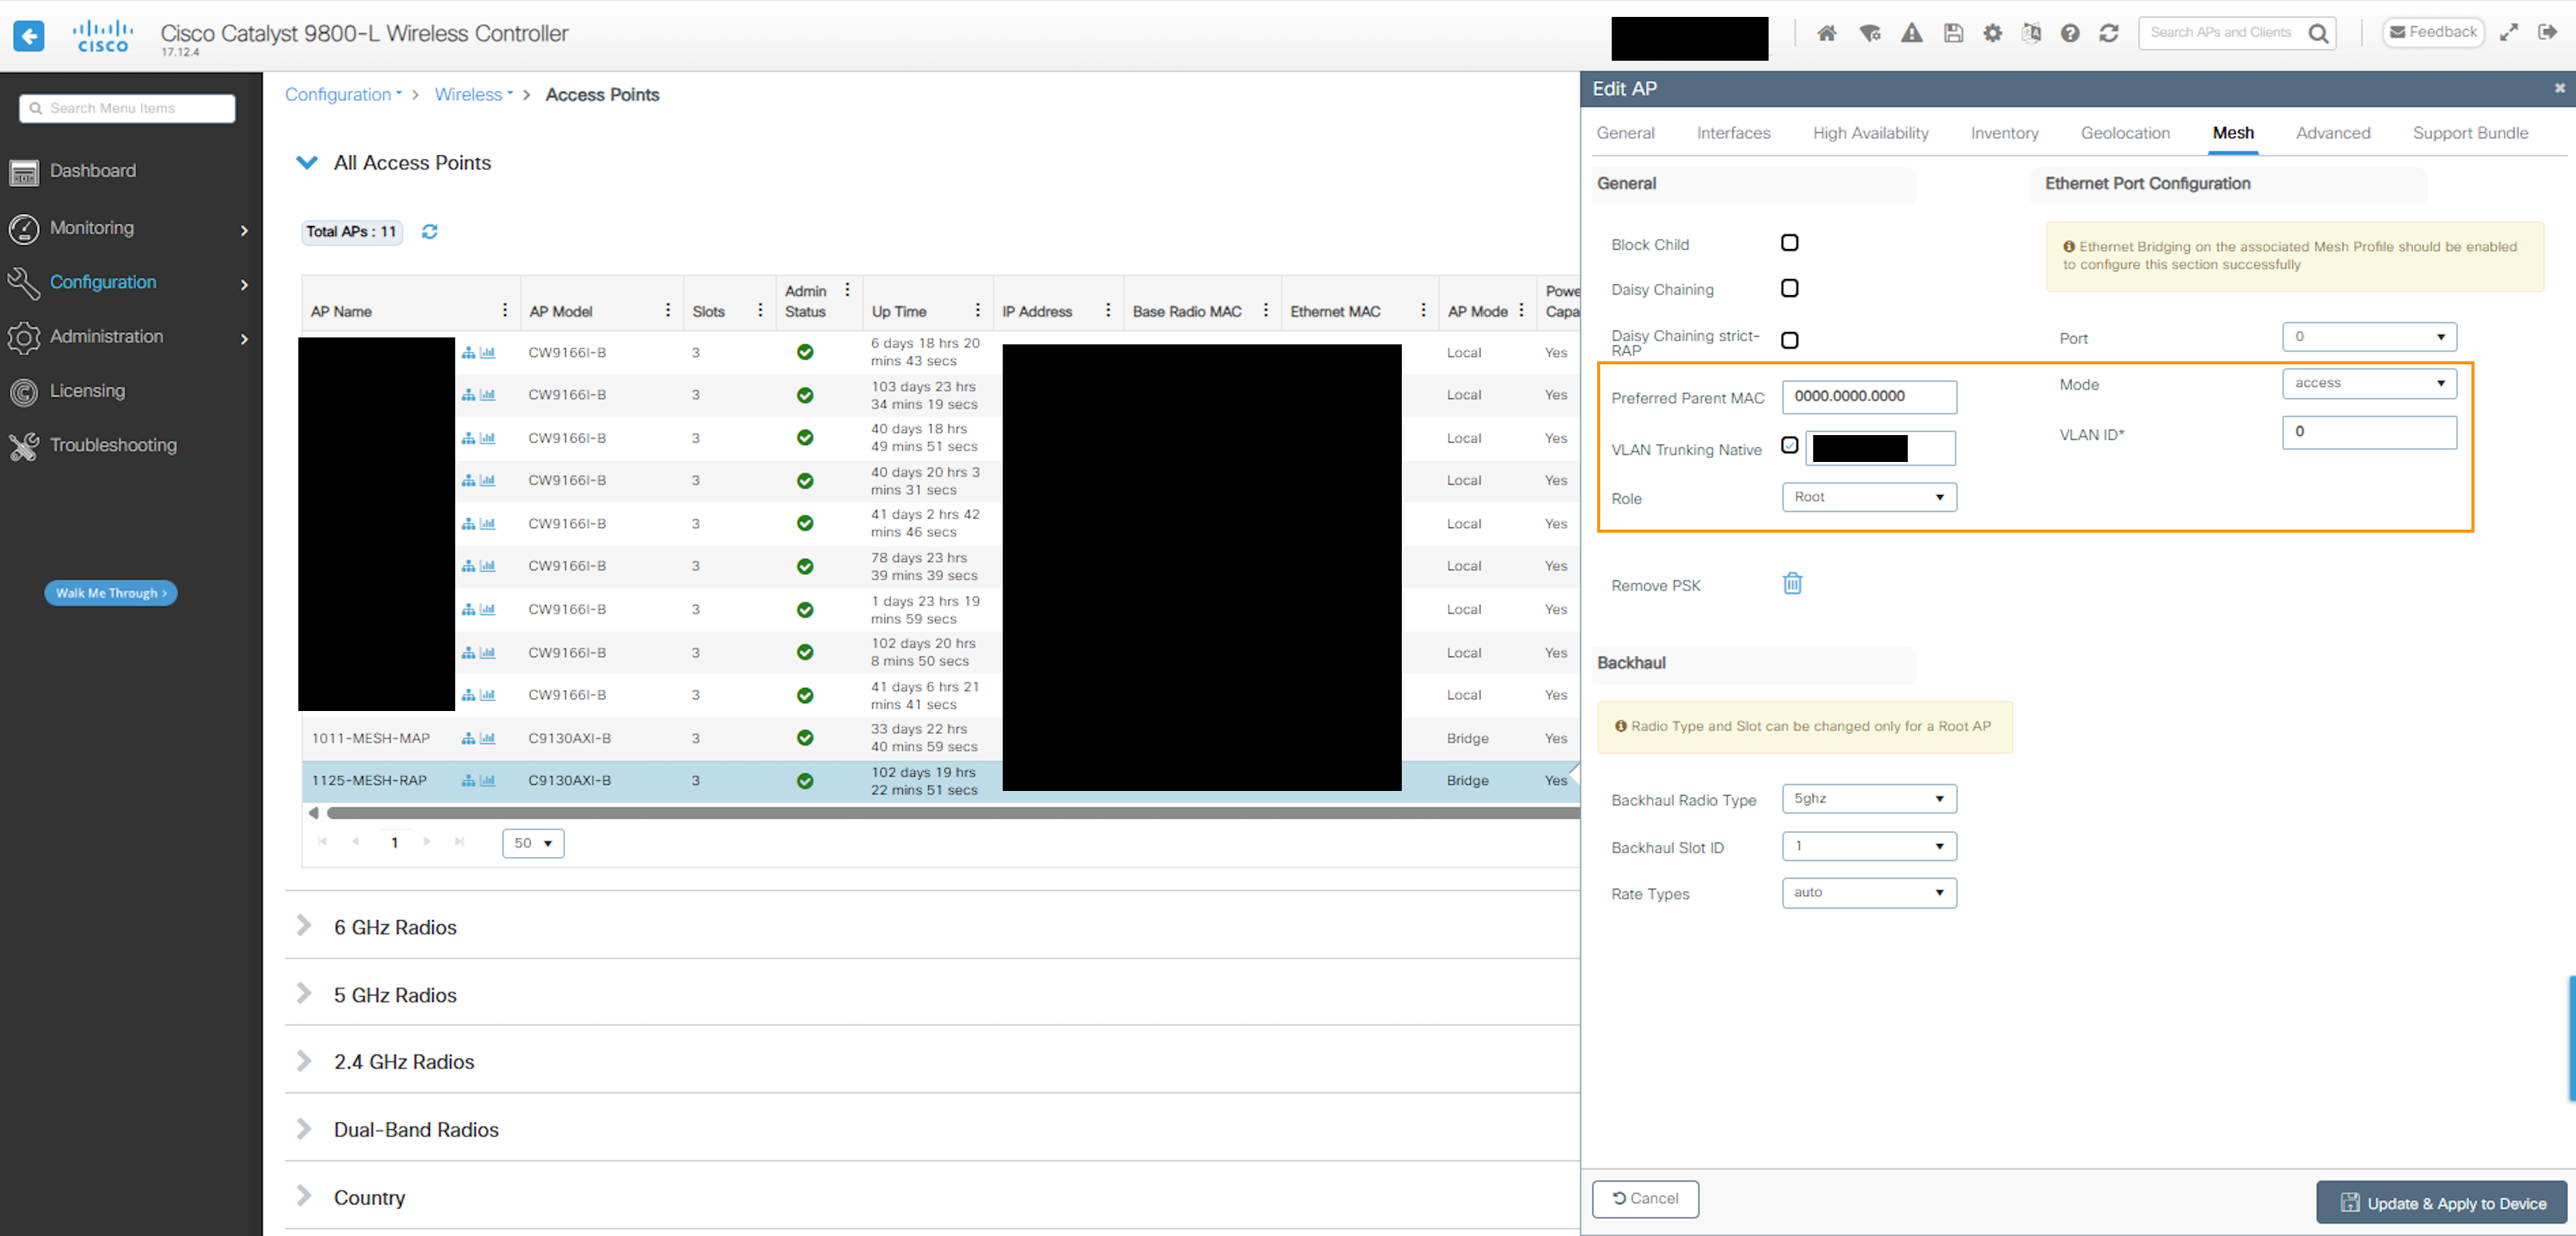 For the RAP configuration:
Configuration>Wireless>Access Points>Edit AP>Mesh
Set the AP into "Root" Role with VLAN Trunking Native "checked" under different VLAN than "1" and with Ethernet Port Configuration Mode "access".
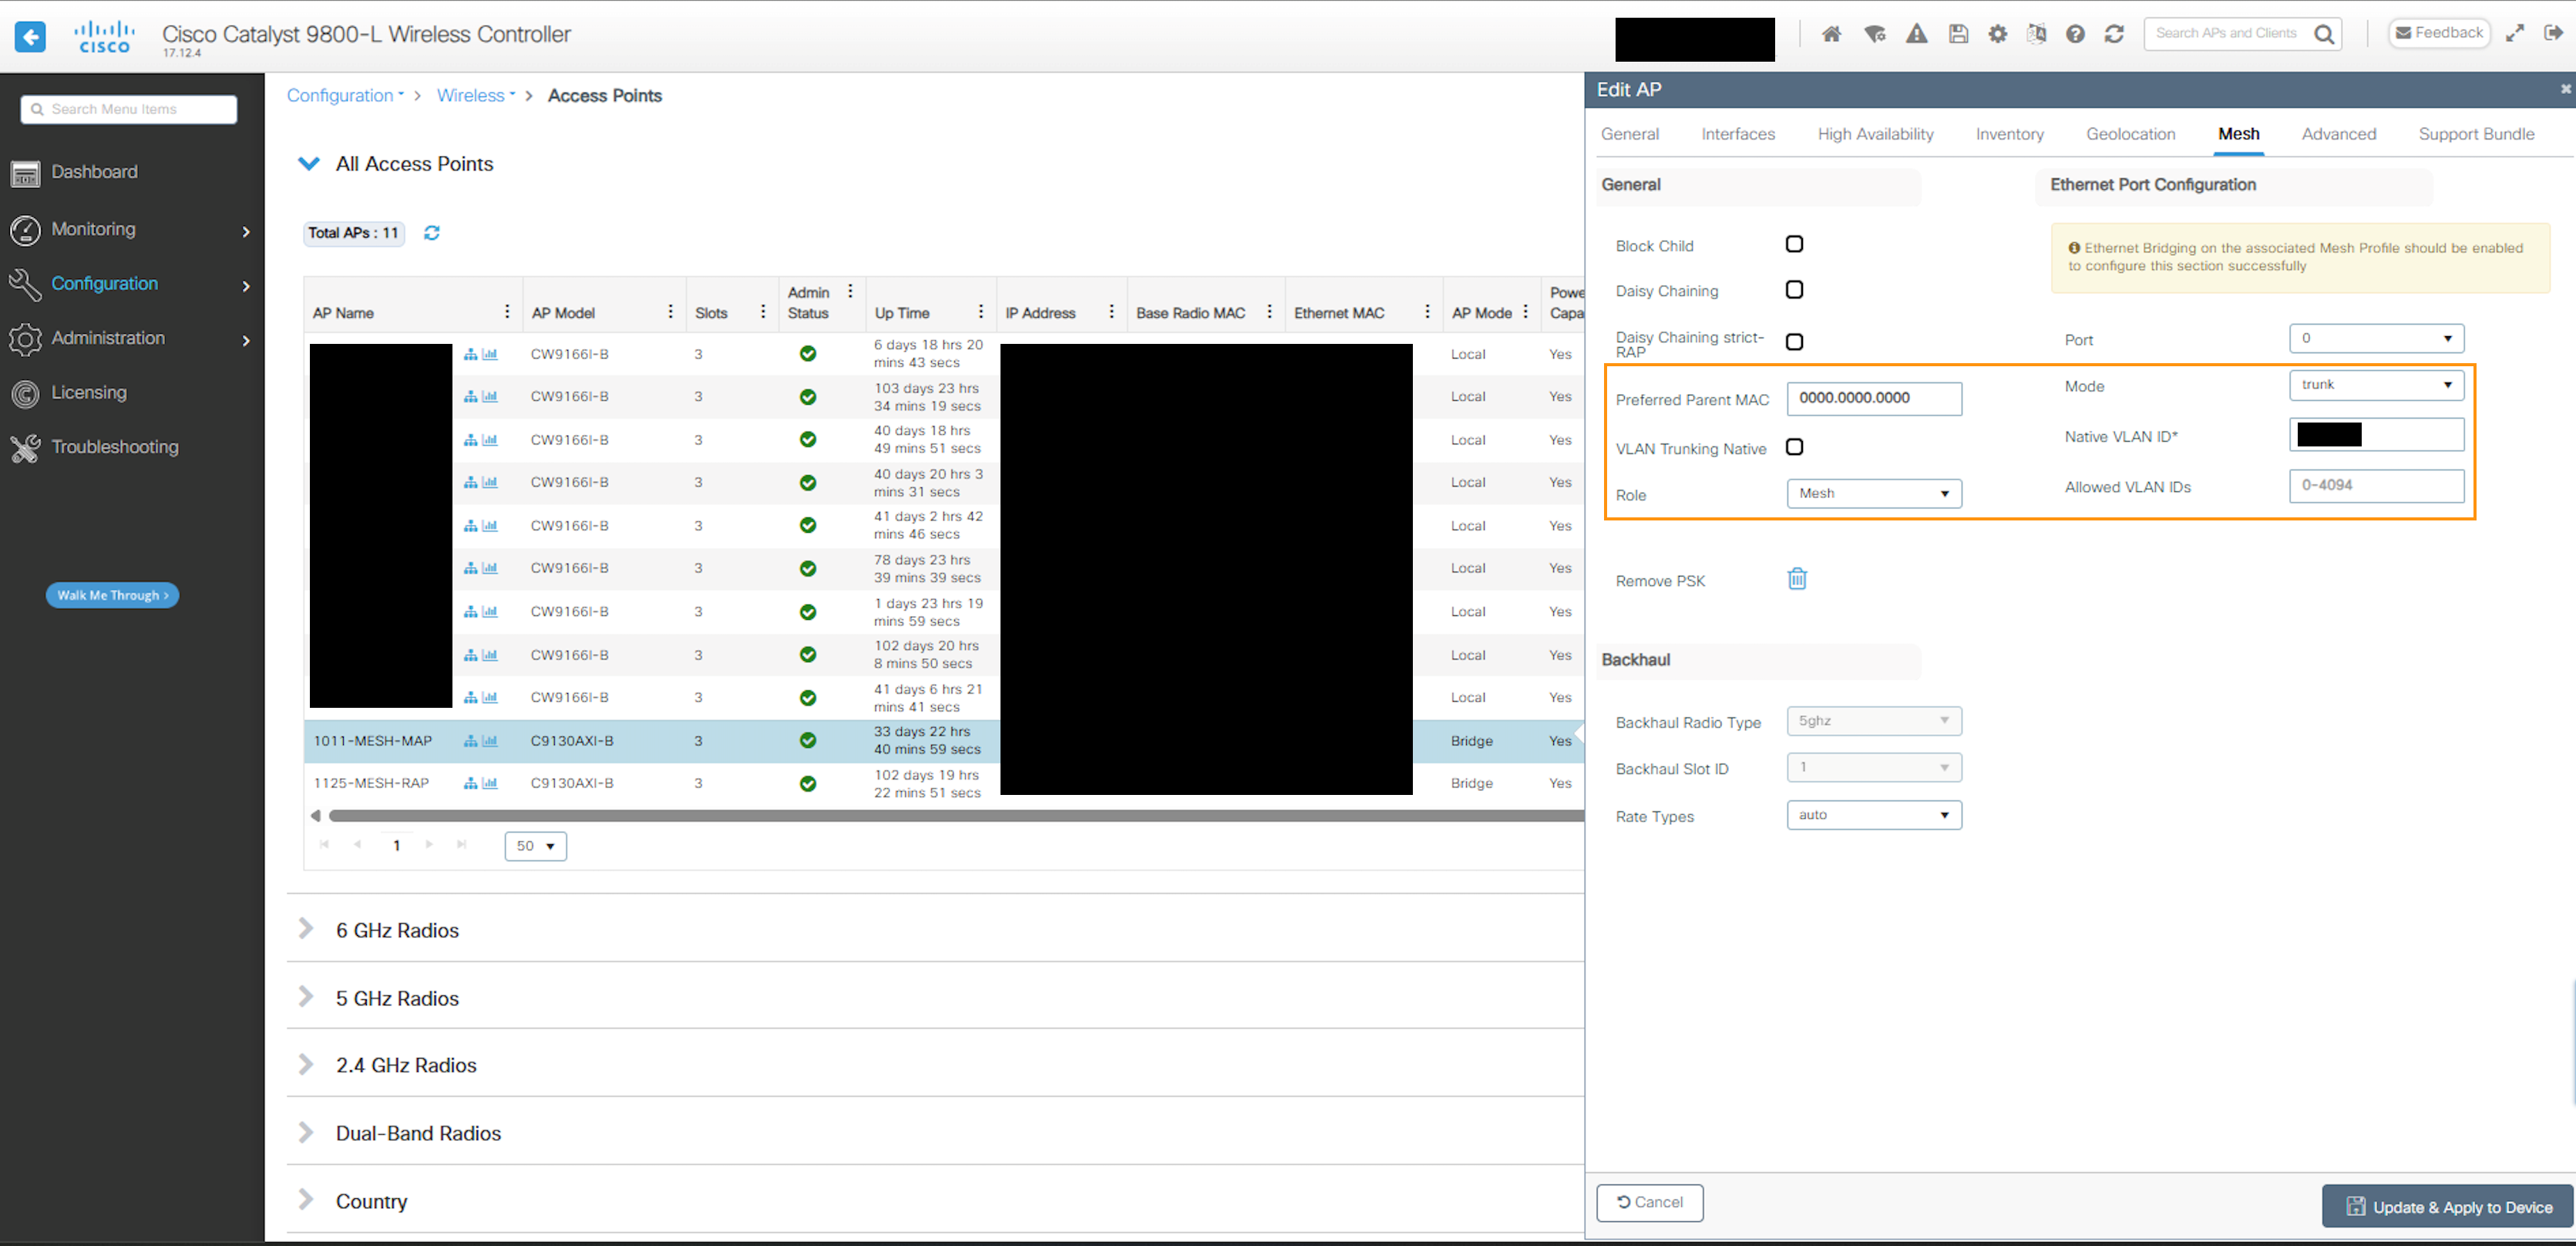 For the MAP configuration:
Configuration>Wireless>Access Points>Edit AP>Mesh
Set the AP into "Mesh" Role with VLAN Trunking Native "unchecked" under different Native VLAN ID than "1" and with Ethernet Port Configuration Mode "trunk".
Resources:

Comments: